Friday, September 25, 2009

Indian Curry Fried Eggplant


I'm always at a loss when it comes to a side dish for Indian cuisine. After making these tasty little fried eggplants thet other evening, I have a feeling that my Indian side dish crisis is officially averted.

These fluffy golden nuggets are crispy, ever so lightly battered, and rich with the flavors of a delicious yellow curry. The juicy eggplant inside perfectly compliments the spicy, golden brown crust. Once you taste one of these, it will be hard to stop.

Indian Fried Eggplant
from my trusty Betty Crocker Cookbook

1 medium eggplant (about 1.5 lbs.)
1 cup all-purpose flour
1 teaspoon baking powder
1 teaspoon salt
1 teaspoon turmeric
2 teaspoons curry powder
1 cup milk
1 egg
1/4 cup salad oil

Wash eggplant. Beat remaining ingredients vigorously with a whisk until smooth. Heat oil one-inch deep to 375 in a large skillet.

Cut the eggplant into 1/4-inch slices (we had some long and skinny eggplants from our CSA farm basket, so I just cut them into little medallions). Dip the slices in the batter, letting the excess drip into the bowl. Fry in hot oil until golden brown - about 2-3 minutes - turning once.


Drain on paper towels. If desired, salt to taste.

To keep the slices warm and crisp, place in a 300 degree oven until ready to serve.

Thursday, September 24, 2009

Shrimp Scampi


Shrimp Scampi has been one of my favorite dishes for years. When I was little, my dad would tease me and call it "Scamp Shrimpi."

This version is not only tasty, but pretty easy and quick too! The shrimp are cooked perfectly, and the lemon and white wine blend beautifully with the shallot, garliic, and parsley for a light but satisfyingly rich dish.


Shrimp Scampi
adapted from Tyler Florence

1 pound linguini
4 tablespoons unsalted butter
4 tablespoons extra virgin olive oil
1 large shallot, finely chopped
6 cloves garlic, sliced
Pinch red pepper flakes (optional)
1 pound large shrimp, peeled and de-veined, but leave the tail on
Sea salt and freshly ground pepper to taste
1/2 cup dry white wine (a nice sauvignon blanc works quite well)
Juice and zest of 1 lemon
1/4 cup chopped parsley leaves

For the pasta, put a large pot of water on the stove to boil. When it has come to the boil, add a couple of tablespoons of salt and the linguini. Stir to make sure the pasta separates; cover. When the water returns to a boil, cook for about 6 to 8 minutes or until the pasta is not quite done. Drain the pasta reserving 1 cup of water.

Meanwhile, in a large skillet, melt 2 tablespoons butter in 2 tablespoons olive oil over medium-high heat. Saute the shallots, garlic, and red pepper flakes (if using) until the shallots are translucent, about 3 to 4 minutes. Season the shrimp with salt and pepper; add them to the pan and cook until they have turned pink, about 2 to 3 minutes. Remove the shrimp from the pan; set aside and keep warm. Add wine and lemon juice and bring to a boil. Add 2 tablespoons butter and 2 tablespoons oil. When the butter has melted, return the shrimp to the pan along with the parsley and cooked pasta and reserved pasta water. Stir well and season with salt and pepper. Drizzle over a bit more olive oil and serve immediately.

Wednesday, September 23, 2009

Pork Tenderloin with Sweet Potatoes and Apples


Here is a super retro recipe that I found in one of my vintage cookbooks. I was so excited to find The Meats Cookbook by Southern Living at a book fair I visited several months ago. What could be more exciting for a southern gal than a whole cookbook of meats?

This recipe captures some of my favorite fall flavors - absolutely delicious! The pork is tender and juicy, sweet with the flavors of the apple juice and cinnamon. The sweet potatoes melt in your mouth. And the apples? Let's just say it's like having dessert built-in to your meal!

Pork Tenderloin with Sweet Potatoes and Apples
Adapted from The Meats Cookbook by Southern Living

1 tablespoon olive oil
1 large pork tenderloin
2 cups milk
1/2 cup flour
salt and pepper to taste
1/2 teaspoon cinnamon
4 medium apples, peeled and cored
4 tablespoons brown sugar
4 tablespoons raisins
2 large sweet potatoes, quartered
4 large marshmallows

Heat the olive oil in a heavy skillet on the stove. Meanwhile, dip the pork in the milk. Mix the flour with the salt and pepper and cinnamon, and dredge the pork with the flour mixture. Brown the pork in the skillet over medium-high heat.

Meanwhile, fill the center of the cored apples with the brown sugar and raisins, and place the sweet potatoes and the apples in your crock pot. Add the pork and any drippings. Pour over the remaining milk and cover.


Cook on low for about 6-8 hours or on high for about 4 hours. Place a marshmallow on each apple just before serving (optional).

Tip: You could easily adapt this recipe for a dutch oven by adding all your ingredients to the pot after browning the meat. Cover and cook over low heat for 1 hour and 15 minutes.


Tuesday, September 22, 2009

Pumpkin Bread


I couldn't say it better than my mom did: It's fall!! It's time for Pumpkin Bread!!

Here is what she wrote to me in an email when I asked her about the history behind her delicious pumpkin bread.

Yes it is definitely time for pumpkin bread! This is the recipe from the mother (Rose) of a very good friend of Nanny's. Nanny would make this and send it to me when I was in college back in the sixties. I think it is the only pumpkin bread recipe I've ever seen that does not include cinnamon. Although cinnamon makes for a great pumpkin experience, leaving it out seems to allow the pumpkin to shine.


Rose's Pumpkin Bread

3 cups sugar
1 cup vegetable or canola oil
4 eggs
1 teaspoon salt
1 teaspoon nutmeg (fresh grated nutmeg is best!)
2/3 cup water
2 cups pumpkin (1 15-ounce can pumpkin will work)
3 1/2 cups flour
2 teaspoons baking soda
1 cup chopped pecans (optional)

Preheat your oven to 350 degrees and grease 2 large loaf pans (9" by 5") and set aside.

In a large mixing bowl, mix all ingredients together and beat for 2 minutes with electric mixer until smooth. Divide into the loaf pans. Each pan will be about 2/3 full.

Bake for 50-60 minutes. Make sure center is done - a toothpick inserted into the center should come out clean.

Note: This bread freezes very well.

Note: For muffins, bake at 350 degrees for 20 minutes.

Note: We have added chocolate chips to this recipe, and it was delicious!


Monday, September 21, 2009

Nanny's Fresh Blueberry Pie


Aaaahhh, the end of the summer. Tomorrow marks the first day of fall here in Georgia. Last night, the hubs and I enjoyed such a lovely evening at my parents' house in Atlanta. And Nanny herself was there with one of her famous pies.

I admit it, dear readers: I've been holding out on you.

I've been saving some of the best of the best recipes in my family . . . saving them for a rainy day. Well, I'm not sure whether you've heard, but it's raining buckets here in drought-ridden North Georgia, so it's about time for me to share one of these precious gems with you all!

My sweet grandmother "Nanny" is famous for her pies. In the summertime, it's all about the blueberries . . . Nanny's fresh blueberry pie is delicious enough to bring tears to your eyes . . . and yet so wonderful in its simplicity. I think that most of Nanny's recipes shine through in their beautiful simplicity - truly highlighting the fresh ingredients without need for masking them with a myriad of distracting flavors.

So here is my gem for you today, dear readers, as the rain pours down over Georgia. Happy autumnal equinox - have a slice of pie!


Nanny's Fresh Blueberry Pie

Pastry:
2 cups flour
1 teaspoon baking powder
1/2 teaspoon salt
6 ounces of shortening
2 ounces of ice cold water

Filling:
4 cups fresh blueberries
2 tablespoons flour
1/2 cup sugar
1/8 teaspoon salt
1 teaspoon lemon juice
1 tablespoons butter

Preheat your oven to 400 degrees.

For the pastry, sift together the dry ingredients in a large bowl. Add shortening and blend with pastry blender until the mixture reaches the consistency of small peas. Add ice water and chop mixture with a knife. Mix with your hand until a soft ball forms. Separate into halves. Take the first piece and roll in extra flour. Line a 9" pie pan with the first half, leaving a small overlap around the edges of the pie dish. Repeat with the second half of the dough, and set aside.

For the filling, mix flour, sugar, and salt. Sprinkle 1/4 of this mixture on the uncooked bottom crust. Add blueberries. Sprinkle the remainder of the sugar mixture on top. Sprinkle with lemon juice, and dot with the butter. Flute the top crust, pinching it to the bottom crust.

Bake for 15 minutes. Then reduce the heat to 350 degrees, and bake for about 25-30 more minutes, until the berries are tender. Cool before slicing and serve with vanilla ice cream.


Sunday, September 20, 2009

Easy Key Lime Pie


Okay, so I know that I've already given you the pretty much perfect, authentically tart and delicious key lime pie recipe, but let's be honest. Don't you get a hankering for this stuff even at times when key limes might not be in season? I know I do. Not to mention the fact that I can only really talk the husband into juicing 30 key limes about once a year or else I start to push my wonderful prep chef to his limits . . . So I decided to celebrate this time of year when summer is coming to an end with a super easy "real simple" key lime pie recipe.


Easy Key Lime Pie
adapted from Real Simple

1 14-ounce can sweetened condensed milk
1 8-ounce package of cream cheese
1 6-ounce can frozen limeade concentrate
1 cup heavy cream
Zest of one lime
Graham cracker crust
Whipped cream, for garnish.

Using an electric mixer, beat the cream cheese until soft and smooth. Gradually add the condensed milk, combining until completely integrated. Finally, add the limeade, the heavy cream, and half of the lime zest. Beat until the mixture is fluffy and soft peaks form.

Next, pour the filling into the graham cracker crust, smoothing with a spatula. Refrigerate for at least 4 hours, preferably overnight. If you have any trouble getting the key lime pie to set, then I recommend throwing it in the freezer for about 2-3 hours before you serve it for a delightfully refreshing (and firm) pie!

Finally, sprinkle the lime zest on top before serving and garnish with a bit of freshly whipped cream!


Wednesday, September 16, 2009

Stewed Okra and Tomatoes


Here is a side dish that my green-thumbed hubby likes to make during the summertime when he has an abundance of tomatoes and okra in the garden. He likes to eat it served over rice.

Stewed Okra and Tomatoes

2 cups okra, cut until 1/2 inch slices
2 cups ripe tomatoes, cored and then diced
4 medium cloves of garlic, thinly sliced
1 cup water
Salt and pepper to taste
Brown rice, cooked

Combine the okra, tomatoes, garlic, and water in a medium saucepan. Season to taste with salt and pepper. Bring the mixture to a boil. Then, cover, and lower the heat to a simmer.

In true southern fashion, my husband says that you should cook it "until it's mushy." But I think about 1-1.5 hours is usually plenty to make the veggies nice and tender, the flavors nice and melded. Stir occasionally and add extra water if your veggies begin to dry out. Serve over hot rice. Enjoy!


Monday, September 14, 2009

Taco Dip


It's that season again . . . the crisp hint of chill in the air, the tips of the leaves are just beginning to turn colors, you feel the need for that last-minute reach for an extra blanket at night.

Yep, it's football season!!! And that means tailgating. Here is a delicious dip that we enjoyed at our own tailgate this past weekend. It was the Georgia Bulldogs' first home game, and it was a great one! Enjoy the recipe and the season.

Taco Dip
from my Aunt Cathie

1 lb. ground beef
1 1.25-ounce package dry taco seasoning mix
1 8-ounce package cream cheese
1/2 cup sour cream
1/2 cup chopped green pepper
1/2 cup chopped tomato
1 cup shredded cheddar jack cheese
1/4 cup sliced black olives
Cilantro or green onion, chopped (optional)
Tortilla chips (I like Frito Scoops for this)

Brown ground beef and drain all grease. Add the taco seasoning mix and set aside.

Beat cream cheese with sour cream. Spread mixture in a pan. Cover with the meat. Top with chopped green pepper, chopped tomatoes, shredded cheddar jack cheese and black olives. Garnish with cilantro or green onions. Serve with tortilla chips for dipping.

Tip: Add a layer of refried beans, black beans, and/or guacamole for a delicious seven-layer Mexican dip!


Sunday, September 13, 2009

Julia Child's Ratatouille


I, dear readers, like many other home cooks, completely idolize Julia Child. I mean, what American cook wouldn't want to be her?! Learning to cook in France, bringing a new cuisine to home cooks in America, the whole shebang - she's pretty much just the best.

Not surprisingly, I, like many other food bloggers, went to see Julie & Julia, the recent film about a blogger who worked her way through Julia Child's Mastering the Art of French Cooking - all in one year. In fact, every time the trailer for this film would come on the television, my cute hubby would say, "Wow, that is so you. We've got to see that!"

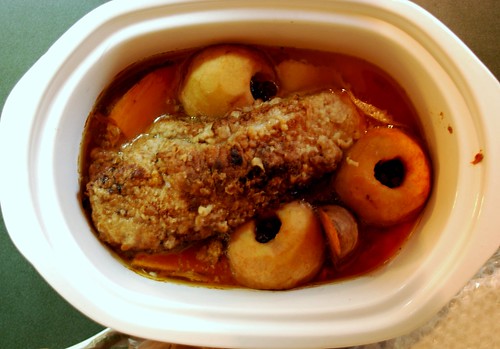
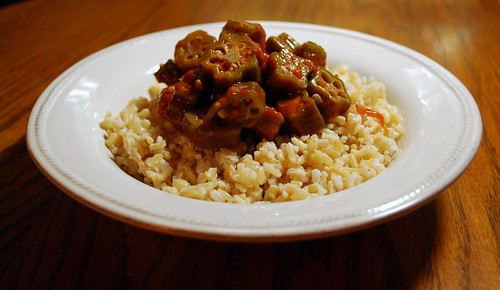
Well, the movie was quite nice - even the hubs enjoyed it. So when we ended up with a bunch of random veggies in the fridge (thanks to our wonderful CSA farm), I thought it was a great idea to use them up by making a classic French-Provençal dish: ratatouille. And of course, whose recipe would I use but Julia's!?

Well, I have to admit that Julia was right when she said that ratatouille "is not one of the quickest dishes to make." Although a bit time-intensive, the techniques are not difficult, and the results completely justify the effort. It's hard to imagine a dish that is this simple in its seasonings and ingredients, and yet this rich in its layers and layers of flavor.

Without further ado, let me give you the recipe, in the words of Julia Child herself. . .


Julia Child's Ratatouille
from Mastering the Art of French Cooking

1 pound eggplant
1 pound zucchini
A 3-quart, porcelain or stainless-steel mixing bowl
1 teaspoon salt

A 10- to 12-inch enameled skillet
4 tablespoons olive oil, more if needed

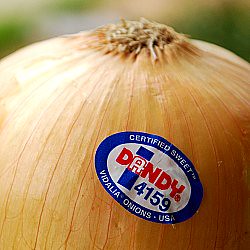
1/2 pound (about 1 1/2 cups) thinly sliced yellow onions
2 (about 1 cup) sliced green bell peppers
2 to 3 tablespoons olive oil, if necessary
2 cloves mashed garlic
Salt and pepper to taste

1 pound firm, ripe, red tomatoes, peeled, seeded and juiced (makes 1 1/2 cups pulp)
Salt and pepper

A 2 1/2 quart fireproof casserole about 2 1/2 inches deep
3 tablespoons minced parsley
Salt and pepper

Peel the eggplant and cut into lengthwise slices 3/8 inch thick, about 3 inches long and 1 inch wide. I actually just sliced it in half lengthwise and then cut it into half-moons.

Scrub the zucchini, slice off the two ends and cut the zucchini into slices about the same size as the eggplant slices. I cut mine into medallions because we had a really long, skinny one!

Place the vegetables in a bowl and toss with the salt. Let stand for 30 minutes. Drain. Dry each slice in a towel.

One layer at a time, saute the eggplant and then the zucchini in hot olive oil in the skillet for about a minute on each side to brown very lightly. Remove to a side dish. I found it helpful to add a bit more olive oil with each batch to get them nice and golden brown.

In the same skillet, cook the onions and peppers slowly in olive oil for about 10 minutes, or until tender but not browned. Stir in the garlic and season to taste.

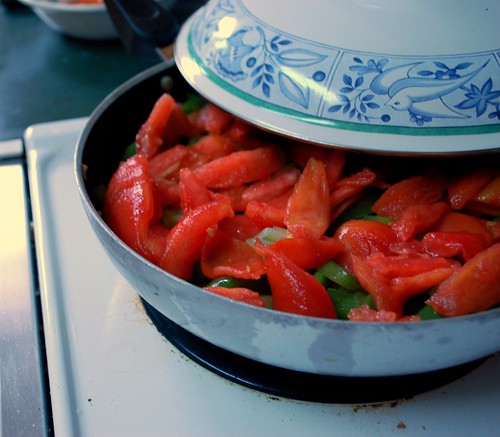
Slice the tomato pulp into 3/8-inch strips. Lay them over the onions and peppers. Season with salt and pepper. Cover the skillet and cook over low heat for 5 minutes, or until tomatoes have begun to render their juice. Uncover, baste the tomatoes with the juices, raise heat and boil for several minutes, until juice has almost entirely evaporated. I tipped the skillet and used a spoon instead of a baster, and it worked very well.


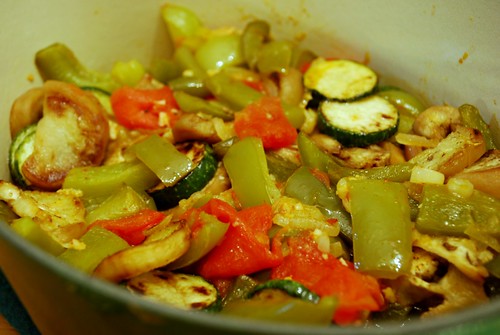
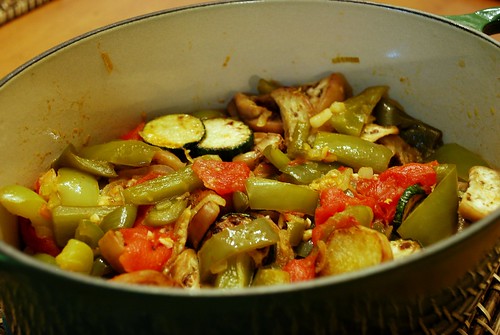
Place a third of the tomato mixture in the bottom of the casserole and sprinkle over it 1 tablespoon of the parsley. Arrange half of the eggplant and zucchini on top, then half the remaining tomatoes and parsley. Put in the rest of the eggplant and zucchini and finish with the remaining tomatoes and parsley. I went with one of my trusty Le Creuset pieces.

Cover the casserole and simmer over low heat for 10 minutes. Uncover, tip casserole and baste with the rendered juices. Correct seasoning, if necessary. Raise heat slightly and cook uncovered for about 15 minutes more, basting several times, until juices have evaporated leaving a spoonful or two of flavored olive oil. Be careful of your heat; do not let the vegetables scorch in the bottom of the casserole.

Set aside uncovered. Reheat slowly at serving time or serve cold. Yields 6-8 servings.

Thursday, September 3, 2009

Chocolate Pudding Scrummie


Uuuhhh, looks a little scrummie if you ask me . . .

Here is my Auntie Moo Moo Chocolate Pudding Scrummie. Back in the 1950s, she would make this dessert for her three daughters so that they could have a special treat when they came home from school.

This dessert is like the fudgiest brownie with a built-in chocolate syrup! The consistency is half-cake-like, half pudding-like. The crispy toasted top gives way to tender cake and steamy chocolate goo underneath. Top it off with some freshly whipped cream, and you have . . . well . . . scrummie!!

Disclaimer: This dessert is very, very sweet - hope you have a sweet tooth!! :-)


Chocolate Pudding Scrummie
from my Auntie Moo Moo

1 cup flour
¾ cup sugar
1/2 teaspoon salt
2 teaspoons cocoa powder
2 teaspoons baking powder
½ cup chopped walnuts
½ cup milk
2 tablespoons melted butter
1 teaspoon vanilla

½ cup brown sugar
½ cup white sugar
2 tablespoons cocoa powder
1 cup cold water

Preheat your oven to 350 degrees and grease an 8x8-inch square pan.

In a medium bowl, mix together the flour, sugar, salt, cocoa, baking powder, walnuts, milk, butter, and vanilla. Spread evenly in the bottom of your prepared pan.

Next, mix together the brown sugar, white sugar, and cocoa powder and sprinkle over batter in pan. Pour the cold water over the top, and do not stir!

Bake for 45 minutes. Serve warm or cold - topped with whipped cream or ice cream!


Made by Lena