Thursday, October 22, 2009

Gingerbread Muffins


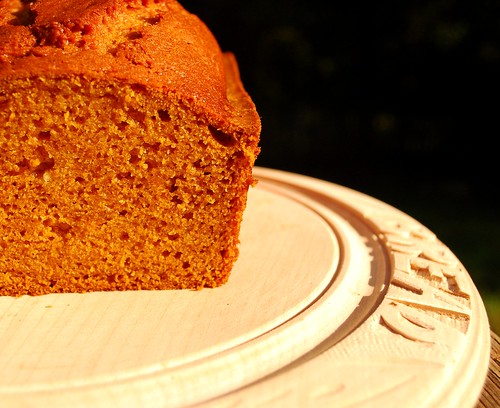
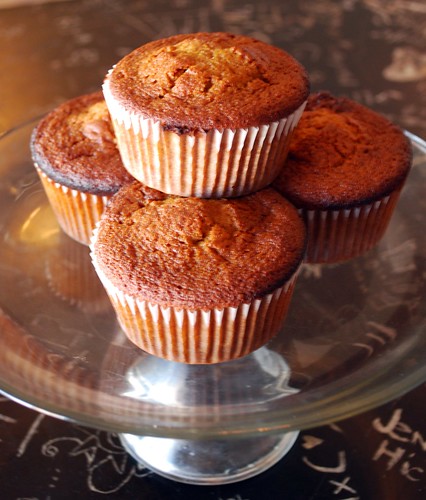
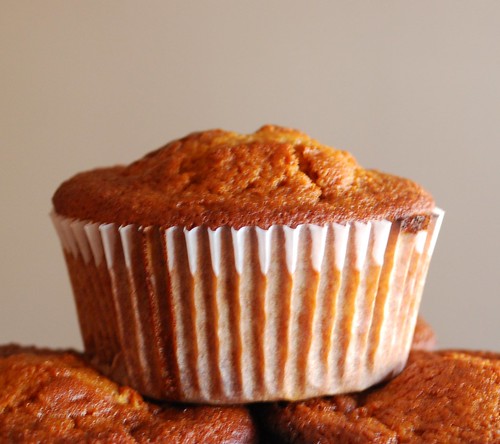
As much as I love gingerbread cookies, I have to admit that I like actual gingerbread even more. I used to use a wonderful old recipe from Nathalie Dupree to make pans of gingerbread in the fall. Based on that recipe, I developed a perfect muffin that features all the richness and flavor of a classic old-fashioned gingerbread.

Gingerbread Muffins
adapted from Nathalie Dupree's recipe for Old-Fashioned Gingerbread

1/2 cup sugar
1/2 cup butter
1 egg
1 cup molasses
2 cups flour
2 1/2 teaspoons baking powder
1 teaspoon salt
2 1/2 teaspoons ginger
1/2 teaspoon cinnamon
1/2 cup buttermilk
1/2 cup coca cola, apple cider or apple juice
1 teaspoon brandy flavoring or vanilla extract

Preheat your oven to 350 degrees. Line or grease well a muffin tin, and set aside.

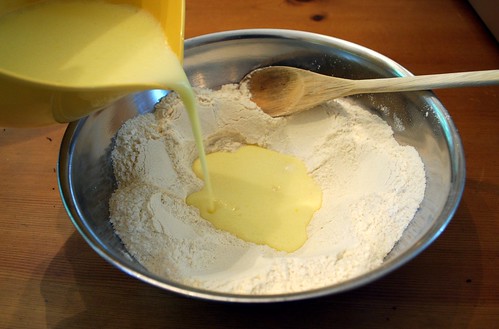
In a large bowl of an electric mixer, beat the sugar and butter until light and fluffy. Add the egg and the molasses and mix well.

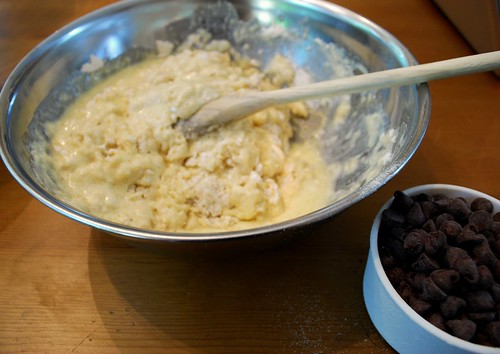
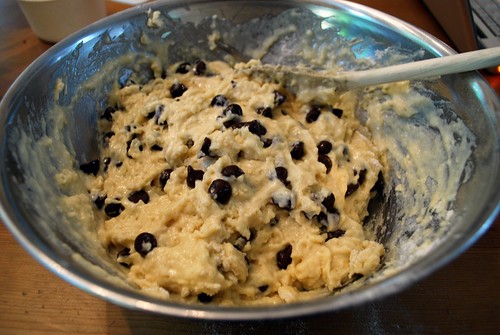
In a separate bowl, sift together the dry ingredients. In another bowl, mix together the buttermilk, the coke or juice, and the brandy or vanilla flavoring. Add these two mixtures to the molasses mixture alternately, beginning and ending with the dry mixture. Beat until the batter is smooth.

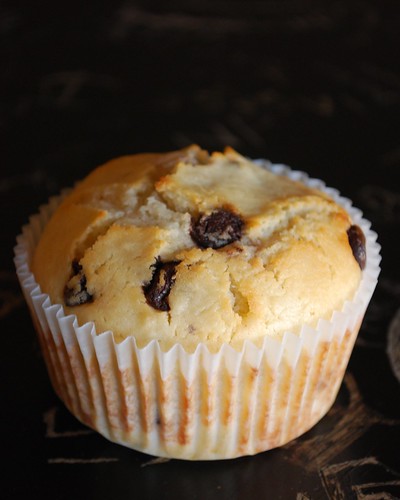
Fill each muffin cup about 3/4 of the way full. Bake for approximately 18-20 minutes, or until the muffins spring back when lightly touched with a finger. Yield about 18 muffins.


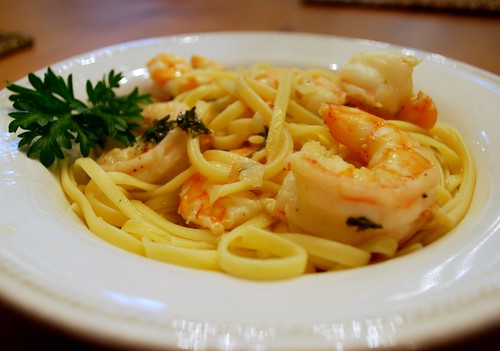
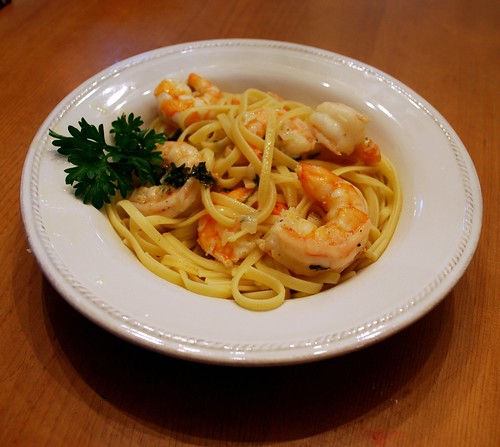
To turn this muffin into a lucious dessert, top with creamy Peach Sauce . . .

Peach Sauce
based on Nathalie Dupree's recipe

4 egg yolks
1/4 cup sugar
1/3 cup peach juice, peach brandy, or peach schnapps
1 cup heavy cream, whipped
1 teaspoon almond extract

In a heavy saucepan, combine the egg yolks and sugar.

In a separate, smaller saucepan, heat the peach juice/brandy/schnapps. (You can also do this in the microwave if you prefer).

Pour the hot peach juice gradually into the egg-yolk mixture, whisking constantly. Turn on low heat, and continue whisking until mixture thickens. This could take up to 15 minutes (trust me, it's worth it). Remove from ehat and cool for about 10 minutes, then fold in the whipped cream and vanilla. You may wish to make this ahead of time - if so, chill the sauce until you are ready to serve.

Wednesday, October 21, 2009

Buttermilk Chocolate Chip Muffins


This is a deliciously tender and flavorful muffin studded with rich chocolate chips. I made up this recipe for the little cafe. It is already a favorite with my dad, who makes sure to pick up extras every time he comes by!

Buttermilk Chocolate Chip Muffins

2 cups flour
1/2 cup sugar
2 1/4 teaspoons baking powder
1 teaspoon salt
1/4 teaspoon baking soda
1/4 teaspoon cinnamon
1 egg, lightly beaten
1 cup buttermilk
1 teaspoon vanilla
1/2 cup vegetable oil
1/2 cup whipping cream, beaten until soft peaks form
1 cup semisweet chocolate chips

Preheat your oven to 425 degrees. Grease muffin pans or line with paper liners, and set aside.

Combine the dry ingredients well, and set aside. In a smaller bowl, combine the egg, buttermilk, and oil, mixing well.

Use a spoon to make a well in the center of the dry ingredients. Then pour the liquid ingredients into the well.


Use the spoon to stir together JUST until the dry ingredients are almost moistened. Gently fold in the whipped cream.


Finally, fold in the chocolate chips, being careful not to over-mix.


Fill the muffin cups about 2/3 of the way full. Bake for 18-20 minutes, until the tops are lightly golden brown. Remove to racks and cool.


Friday, October 16, 2009

Pumpkin Cheesecake Muffins


Okay, dear readers, I'm coming out of the closet, so to speak. My posting may have become a bit less frequent these past few months. That's because I've started an exciting new project. My friends here in town own a small coffee shop, and they have let me come in and do some of the baking for them - homemade breads, delicious muffins, and fresh pastries and desserts. It's been so much fun! Here is one of the recipes that I tried out at our little café this week. They are pretty much the ultimate fall muffin!!


Pumpkin Cheesecake Muffins
adapted from BakeSpace via Annie's Eats

3 cups flour
3 teaspoons cinnamon
2 teaspoons nutmeg
1 ½ teaspoons ground cloves
1 teaspoon salt
1 teaspoon baking soda
4 eggs
1 ¼ cups vegetable oil
2 cups sugar
2 cups pumpkin puree

4 ounces cream cheese, softened
4 ounces marscapone cheese, softened
½ cup powdered sugar

½ cup brown sugar
½ cup flour
4 tablespoons cold butter, cubed
1 ½ teaspoons cinnamon
1/2 cup finely chopped pecans

First, prepare the filling. Combine the cream cheese, marscapone cheese, and powdered sugar in the bowl of an electric mixer until smooth and fluffy. Form into a log on plastic wrap or foil, making sure that the diameter is small enough to fit into the well of a muffin pan. Wrap the log up tightly and freeze for at least one hour.

Preheat the oven to 350°. Line muffin pans with paper liners for 24 muffins.

To make the muffin batter, combine the flour, spices, salt and baking soda in a medium bowl. Whisk together and set aside. In the bowl of your electric mixer, combine the eggs, the oil, the sugar and the pumpkin. Beat until well combined. Add the dry ingredients and mix on low speed until just the flour is moistened.

To make the streusel topping, combine all ingredients in a small bowl. Mix together with a pastry blender or your fingers until crumbly.

Next, fill each muffin cup halfway with batter. Remove the cheesecake log from the freezer and slice into 24 pieces. Place a slice in each muffin well. Divide the remaining muffin batter evenly among the muffin cups, covering up the cheesecake pieces. Sprinkle the streusel topping over the top of each muffin. Bake for 20-25 minutes. Cool completely on racks before serving.

Wednesday, October 14, 2009

Chewy Blondies


My sweet friend recently lent me her family's old cookbooks to peruse. I love the cookbooks, but my favorite thing is seeing which little slips of paper and newspaper clippings people stuff inside these old cookbooks. These are some of the greatest recipes in my family's cookbooks, so I made sure to copy down some of my friend's too! Here is a great one I found - enjoy!


Chewy Blondies

1 1/4 cup light brown sugar
2/3 cup butter, softened
2 eggs
2 teaspoons vanilla
1 1/3 cup quick-cooking oats
1 1/3 cup flour
3/4 teaspoon salt
3/4 teaspoon baking soda
1/2 cup chopped walnuts
1/2 cup semi-sweet chocolate chips
1/2 cup butterscotch chips (this is my addition)
1/2 cup coconut flake (this is my addition, too)

Preheat your oven to 350 degrees, and grease a 9x13 inch baking dish. Set aside.

In a large electric mixer bowl, combine the brown sugar and the butter, beating until fluffy. Add the eggs and the vanilla, and cream the mixture together. Add the oats, flour, salt, soda, wallnuts, and both flavors of chips, and stir to combine.

Spread the batter in your prepared pan, using a spatula to even it off. Sprinkle the coconut flake on top of the batter. Bake for about 20 minutes, or until lightly golden brown. Cool completely before slicing into bars.


Wednesday, October 7, 2009

Eggplant Rollatini


I'm not a huge fan of eggplant. I'm not even a medium-sized fan of eggplant. Maybe a small one. Maybe. Sure I like it fried in a crispy curry batter, but in general, nope it's just not my favorite.

Guess what filled our last CSA basket of the growing-season to the brim? Bunches and bunches of eggplant! So I'm really branching out here and trying to find some good recipes for all of this fresh eggplant. I remembered this one from our CSA Farm Cookbook, and it was just as good as my memories. The prosciutto adds the perfect hint of meaty flavor to this hearty dish. Even I am wild for this stuff - I hope you enjoy it, too!

Eggplant Rollatini
adapted from our CSA Farm Cookbook

1 1/2 cups flour
3 large eggs
1 teaspoon salt
1 teaspoon pepper
1/4 cup grated parmesan cheese
2-3 medium-small eggplants (about 1.5 lbs.) sliced lengthwise 1/8-inch thick
1 cup vegetable oil
1 cup whole milk ricotta cheese, drained overnight (see instructions below)
2 tablespoons Italian flat-leaf parsley, chopped
1 cup shredded mozzarella cheese, divided
1/4 pound thinly sliced prosciutto
1 1/2 cups marinara sauce
3 tablespoons grated parmesan cheese

In one shallow dish, place 1 cup of flour. Next, place two of the eggs in a second shallow dish, and lightly beat. In a third shallow dish, place salt, and half the pepper, and the parmesan in a bowl with 1/2 cup of the flour and and mix with a fork or a whisk until blended. Dip the eggplant slices in the flour, then into the eggs, then into the flour-and-cheese mixture.

Meanwhile, heat oil in a large, deep skillet until hot but not smoking. Place the prepared eggplant slices in the hot oil and fry for 2 minutes on each side until golden. Remove from the skillet and place on paper-towel lined baking sheets to drain until cool enough to handle.

Preheat the oven to 350 degrees. Place the drained ricotta in a bowl and mash it with a fork. Add the last egg, the parsley, half of the shredded mozzarella, the remaining half of the pepper, and mix well. Set aside.

To stuff the eggplant, place one slice of prosciutto on top of the eggplant.


Next, drop a heaping tablespoon of the ricotta mixture on top of the prosciutto at the wider end of the eggplant slice.


Beginning with the wider end of the eggplant, roll up, from top to bottom. Pour 1 cup of the marinara sauce into an 8x12" baking dish. Place the eggplant rolls side by side on top of the marinara sauce.


Pour the remaining sauce over the eggplant rolls. Sprinkle with the 3 tablespoons of grated parmesan cheese and the remaining 1/2 cup of shredded mozzarella.


Bake for 25 minutes or until bubbly around the edges. Remove from the oven and let cool for 2-3 minutes before serving.

Note: To drain ricotta cheese, peace it in a sieve or cheese cloth and set over a bowl. Cover with plastic wrap and refrigerate for at least 6 hours, or overnight. Discard the whey and use the cheese as directed in the recipe!

For a vegetarian option: simply omit the prosciutto!


Friday, September 25, 2009

Indian Curry Fried Eggplant


I'm always at a loss when it comes to a side dish for Indian cuisine. After making these tasty little fried eggplants thet other evening, I have a feeling that my Indian side dish crisis is officially averted.

These fluffy golden nuggets are crispy, ever so lightly battered, and rich with the flavors of a delicious yellow curry. The juicy eggplant inside perfectly compliments the spicy, golden brown crust. Once you taste one of these, it will be hard to stop.

Indian Fried Eggplant
from my trusty Betty Crocker Cookbook

1 medium eggplant (about 1.5 lbs.)
1 cup all-purpose flour
1 teaspoon baking powder
1 teaspoon salt
1 teaspoon turmeric
2 teaspoons curry powder
1 cup milk
1 egg
1/4 cup salad oil

Wash eggplant. Beat remaining ingredients vigorously with a whisk until smooth. Heat oil one-inch deep to 375 in a large skillet.

Cut the eggplant into 1/4-inch slices (we had some long and skinny eggplants from our CSA farm basket, so I just cut them into little medallions). Dip the slices in the batter, letting the excess drip into the bowl. Fry in hot oil until golden brown - about 2-3 minutes - turning once.


Drain on paper towels. If desired, salt to taste.

To keep the slices warm and crisp, place in a 300 degree oven until ready to serve.

Thursday, September 24, 2009

Shrimp Scampi


Shrimp Scampi has been one of my favorite dishes for years. When I was little, my dad would tease me and call it "Scamp Shrimpi."

This version is not only tasty, but pretty easy and quick too! The shrimp are cooked perfectly, and the lemon and white wine blend beautifully with the shallot, garliic, and parsley for a light but satisfyingly rich dish.


Shrimp Scampi
adapted from Tyler Florence

1 pound linguini
4 tablespoons unsalted butter
4 tablespoons extra virgin olive oil
1 large shallot, finely chopped
6 cloves garlic, sliced
Pinch red pepper flakes (optional)
1 pound large shrimp, peeled and de-veined, but leave the tail on
Sea salt and freshly ground pepper to taste
1/2 cup dry white wine (a nice sauvignon blanc works quite well)
Juice and zest of 1 lemon
1/4 cup chopped parsley leaves

For the pasta, put a large pot of water on the stove to boil. When it has come to the boil, add a couple of tablespoons of salt and the linguini. Stir to make sure the pasta separates; cover. When the water returns to a boil, cook for about 6 to 8 minutes or until the pasta is not quite done. Drain the pasta reserving 1 cup of water.

Meanwhile, in a large skillet, melt 2 tablespoons butter in 2 tablespoons olive oil over medium-high heat. Saute the shallots, garlic, and red pepper flakes (if using) until the shallots are translucent, about 3 to 4 minutes. Season the shrimp with salt and pepper; add them to the pan and cook until they have turned pink, about 2 to 3 minutes. Remove the shrimp from the pan; set aside and keep warm. Add wine and lemon juice and bring to a boil. Add 2 tablespoons butter and 2 tablespoons oil. When the butter has melted, return the shrimp to the pan along with the parsley and cooked pasta and reserved pasta water. Stir well and season with salt and pepper. Drizzle over a bit more olive oil and serve immediately.

Wednesday, September 23, 2009

Pork Tenderloin with Sweet Potatoes and Apples


Here is a super retro recipe that I found in one of my vintage cookbooks. I was so excited to find The Meats Cookbook by Southern Living at a book fair I visited several months ago. What could be more exciting for a southern gal than a whole cookbook of meats?

This recipe captures some of my favorite fall flavors - absolutely delicious! The pork is tender and juicy, sweet with the flavors of the apple juice and cinnamon. The sweet potatoes melt in your mouth. And the apples? Let's just say it's like having dessert built-in to your meal!

Pork Tenderloin with Sweet Potatoes and Apples
Adapted from The Meats Cookbook by Southern Living

1 tablespoon olive oil
1 large pork tenderloin
2 cups milk
1/2 cup flour
salt and pepper to taste
1/2 teaspoon cinnamon
4 medium apples, peeled and cored
4 tablespoons brown sugar
4 tablespoons raisins
2 large sweet potatoes, quartered
4 large marshmallows

Heat the olive oil in a heavy skillet on the stove. Meanwhile, dip the pork in the milk. Mix the flour with the salt and pepper and cinnamon, and dredge the pork with the flour mixture. Brown the pork in the skillet over medium-high heat.

Meanwhile, fill the center of the cored apples with the brown sugar and raisins, and place the sweet potatoes and the apples in your crock pot. Add the pork and any drippings. Pour over the remaining milk and cover.


Cook on low for about 6-8 hours or on high for about 4 hours. Place a marshmallow on each apple just before serving (optional).

Tip: You could easily adapt this recipe for a dutch oven by adding all your ingredients to the pot after browning the meat. Cover and cook over low heat for 1 hour and 15 minutes.


Tuesday, September 22, 2009

Pumpkin Bread


I couldn't say it better than my mom did: It's fall!! It's time for Pumpkin Bread!!

Here is what she wrote to me in an email when I asked her about the history behind her delicious pumpkin bread.

Yes it is definitely time for pumpkin bread! This is the recipe from the mother (Rose) of a very good friend of Nanny's. Nanny would make this and send it to me when I was in college back in the sixties. I think it is the only pumpkin bread recipe I've ever seen that does not include cinnamon. Although cinnamon makes for a great pumpkin experience, leaving it out seems to allow the pumpkin to shine.


Rose's Pumpkin Bread

3 cups sugar
1 cup vegetable or canola oil
4 eggs
1 teaspoon salt
1 teaspoon nutmeg (fresh grated nutmeg is best!)
2/3 cup water
2 cups pumpkin (1 15-ounce can pumpkin will work)
3 1/2 cups flour
2 teaspoons baking soda
1 cup chopped pecans (optional)

Preheat your oven to 350 degrees and grease 2 large loaf pans (9" by 5") and set aside.

In a large mixing bowl, mix all ingredients together and beat for 2 minutes with electric mixer until smooth. Divide into the loaf pans. Each pan will be about 2/3 full.

Bake for 50-60 minutes. Make sure center is done - a toothpick inserted into the center should come out clean.

Note: This bread freezes very well.

Note: For muffins, bake at 350 degrees for 20 minutes.

Note: We have added chocolate chips to this recipe, and it was delicious!


Monday, September 21, 2009

Nanny's Fresh Blueberry Pie


Aaaahhh, the end of the summer. Tomorrow marks the first day of fall here in Georgia. Last night, the hubs and I enjoyed such a lovely evening at my parents' house in Atlanta. And Nanny herself was there with one of her famous pies.

I admit it, dear readers: I've been holding out on you.

I've been saving some of the best of the best recipes in my family . . . saving them for a rainy day. Well, I'm not sure whether you've heard, but it's raining buckets here in drought-ridden North Georgia, so it's about time for me to share one of these precious gems with you all!

My sweet grandmother "Nanny" is famous for her pies. In the summertime, it's all about the blueberries . . . Nanny's fresh blueberry pie is delicious enough to bring tears to your eyes . . . and yet so wonderful in its simplicity. I think that most of Nanny's recipes shine through in their beautiful simplicity - truly highlighting the fresh ingredients without need for masking them with a myriad of distracting flavors.

So here is my gem for you today, dear readers, as the rain pours down over Georgia. Happy autumnal equinox - have a slice of pie!


Nanny's Fresh Blueberry Pie

Pastry:
2 cups flour
1 teaspoon baking powder
1/2 teaspoon salt
6 ounces of shortening
2 ounces of ice cold water

Filling:
4 cups fresh blueberries
2 tablespoons flour
1/2 cup sugar
1/8 teaspoon salt
1 teaspoon lemon juice
1 tablespoons butter

Preheat your oven to 400 degrees.

For the pastry, sift together the dry ingredients in a large bowl. Add shortening and blend with pastry blender until the mixture reaches the consistency of small peas. Add ice water and chop mixture with a knife. Mix with your hand until a soft ball forms. Separate into halves. Take the first piece and roll in extra flour. Line a 9" pie pan with the first half, leaving a small overlap around the edges of the pie dish. Repeat with the second half of the dough, and set aside.

For the filling, mix flour, sugar, and salt. Sprinkle 1/4 of this mixture on the uncooked bottom crust. Add blueberries. Sprinkle the remainder of the sugar mixture on top. Sprinkle with lemon juice, and dot with the butter. Flute the top crust, pinching it to the bottom crust.

Bake for 15 minutes. Then reduce the heat to 350 degrees, and bake for about 25-30 more minutes, until the berries are tender. Cool before slicing and serve with vanilla ice cream.


Sunday, September 20, 2009

Easy Key Lime Pie


Okay, so I know that I've already given you the pretty much perfect, authentically tart and delicious key lime pie recipe, but let's be honest. Don't you get a hankering for this stuff even at times when key limes might not be in season? I know I do. Not to mention the fact that I can only really talk the husband into juicing 30 key limes about once a year or else I start to push my wonderful prep chef to his limits . . . So I decided to celebrate this time of year when summer is coming to an end with a super easy "real simple" key lime pie recipe.


Easy Key Lime Pie
adapted from Real Simple

1 14-ounce can sweetened condensed milk
1 8-ounce package of cream cheese
1 6-ounce can frozen limeade concentrate
1 cup heavy cream
Zest of one lime
Graham cracker crust
Whipped cream, for garnish.

Using an electric mixer, beat the cream cheese until soft and smooth. Gradually add the condensed milk, combining until completely integrated. Finally, add the limeade, the heavy cream, and half of the lime zest. Beat until the mixture is fluffy and soft peaks form.

Next, pour the filling into the graham cracker crust, smoothing with a spatula. Refrigerate for at least 4 hours, preferably overnight. If you have any trouble getting the key lime pie to set, then I recommend throwing it in the freezer for about 2-3 hours before you serve it for a delightfully refreshing (and firm) pie!

Finally, sprinkle the lime zest on top before serving and garnish with a bit of freshly whipped cream!


Wednesday, September 16, 2009

Stewed Okra and Tomatoes


Here is a side dish that my green-thumbed hubby likes to make during the summertime when he has an abundance of tomatoes and okra in the garden. He likes to eat it served over rice.

Stewed Okra and Tomatoes

2 cups okra, cut until 1/2 inch slices
2 cups ripe tomatoes, cored and then diced
4 medium cloves of garlic, thinly sliced
1 cup water
Salt and pepper to taste
Brown rice, cooked

Combine the okra, tomatoes, garlic, and water in a medium saucepan. Season to taste with salt and pepper. Bring the mixture to a boil. Then, cover, and lower the heat to a simmer.

In true southern fashion, my husband says that you should cook it "until it's mushy." But I think about 1-1.5 hours is usually plenty to make the veggies nice and tender, the flavors nice and melded. Stir occasionally and add extra water if your veggies begin to dry out. Serve over hot rice. Enjoy!


Monday, September 14, 2009

Taco Dip


It's that season again . . . the crisp hint of chill in the air, the tips of the leaves are just beginning to turn colors, you feel the need for that last-minute reach for an extra blanket at night.

Yep, it's football season!!! And that means tailgating. Here is a delicious dip that we enjoyed at our own tailgate this past weekend. It was the Georgia Bulldogs' first home game, and it was a great one! Enjoy the recipe and the season.

Taco Dip
from my Aunt Cathie

1 lb. ground beef
1 1.25-ounce package dry taco seasoning mix
1 8-ounce package cream cheese
1/2 cup sour cream
1/2 cup chopped green pepper
1/2 cup chopped tomato
1 cup shredded cheddar jack cheese
1/4 cup sliced black olives
Cilantro or green onion, chopped (optional)
Tortilla chips (I like Frito Scoops for this)

Brown ground beef and drain all grease. Add the taco seasoning mix and set aside.

Beat cream cheese with sour cream. Spread mixture in a pan. Cover with the meat. Top with chopped green pepper, chopped tomatoes, shredded cheddar jack cheese and black olives. Garnish with cilantro or green onions. Serve with tortilla chips for dipping.

Tip: Add a layer of refried beans, black beans, and/or guacamole for a delicious seven-layer Mexican dip!


Sunday, September 13, 2009

Julia Child's Ratatouille


I, dear readers, like many other home cooks, completely idolize Julia Child. I mean, what American cook wouldn't want to be her?! Learning to cook in France, bringing a new cuisine to home cooks in America, the whole shebang - she's pretty much just the best.

Not surprisingly, I, like many other food bloggers, went to see Julie & Julia, the recent film about a blogger who worked her way through Julia Child's Mastering the Art of French Cooking - all in one year. In fact, every time the trailer for this film would come on the television, my cute hubby would say, "Wow, that is so you. We've got to see that!"

Well, the movie was quite nice - even the hubs enjoyed it. So when we ended up with a bunch of random veggies in the fridge (thanks to our wonderful CSA farm), I thought it was a great idea to use them up by making a classic French-Provençal dish: ratatouille. And of course, whose recipe would I use but Julia's!?

Well, I have to admit that Julia was right when she said that ratatouille "is not one of the quickest dishes to make." Although a bit time-intensive, the techniques are not difficult, and the results completely justify the effort. It's hard to imagine a dish that is this simple in its seasonings and ingredients, and yet this rich in its layers and layers of flavor.

Without further ado, let me give you the recipe, in the words of Julia Child herself. . .


Julia Child's Ratatouille
from Mastering the Art of French Cooking

1 pound eggplant
1 pound zucchini
A 3-quart, porcelain or stainless-steel mixing bowl
1 teaspoon salt

A 10- to 12-inch enameled skillet
4 tablespoons olive oil, more if needed

1/2 pound (about 1 1/2 cups) thinly sliced yellow onions
2 (about 1 cup) sliced green bell peppers
2 to 3 tablespoons olive oil, if necessary
2 cloves mashed garlic
Salt and pepper to taste

1 pound firm, ripe, red tomatoes, peeled, seeded and juiced (makes 1 1/2 cups pulp)
Salt and pepper

A 2 1/2 quart fireproof casserole about 2 1/2 inches deep
3 tablespoons minced parsley
Salt and pepper

Peel the eggplant and cut into lengthwise slices 3/8 inch thick, about 3 inches long and 1 inch wide. I actually just sliced it in half lengthwise and then cut it into half-moons.

Scrub the zucchini, slice off the two ends and cut the zucchini into slices about the same size as the eggplant slices. I cut mine into medallions because we had a really long, skinny one!

Place the vegetables in a bowl and toss with the salt. Let stand for 30 minutes. Drain. Dry each slice in a towel.

One layer at a time, saute the eggplant and then the zucchini in hot olive oil in the skillet for about a minute on each side to brown very lightly. Remove to a side dish. I found it helpful to add a bit more olive oil with each batch to get them nice and golden brown.

In the same skillet, cook the onions and peppers slowly in olive oil for about 10 minutes, or until tender but not browned. Stir in the garlic and season to taste.

Slice the tomato pulp into 3/8-inch strips. Lay them over the onions and peppers. Season with salt and pepper. Cover the skillet and cook over low heat for 5 minutes, or until tomatoes have begun to render their juice. Uncover, baste the tomatoes with the juices, raise heat and boil for several minutes, until juice has almost entirely evaporated. I tipped the skillet and used a spoon instead of a baster, and it worked very well.


Place a third of the tomato mixture in the bottom of the casserole and sprinkle over it 1 tablespoon of the parsley. Arrange half of the eggplant and zucchini on top, then half the remaining tomatoes and parsley. Put in the rest of the eggplant and zucchini and finish with the remaining tomatoes and parsley. I went with one of my trusty Le Creuset pieces.

Cover the casserole and simmer over low heat for 10 minutes. Uncover, tip casserole and baste with the rendered juices. Correct seasoning, if necessary. Raise heat slightly and cook uncovered for about 15 minutes more, basting several times, until juices have evaporated leaving a spoonful or two of flavored olive oil. Be careful of your heat; do not let the vegetables scorch in the bottom of the casserole.

Set aside uncovered. Reheat slowly at serving time or serve cold. Yields 6-8 servings.

Thursday, September 3, 2009

Chocolate Pudding Scrummie


Uuuhhh, looks a little scrummie if you ask me . . .

Here is my Auntie Moo Moo Chocolate Pudding Scrummie. Back in the 1950s, she would make this dessert for her three daughters so that they could have a special treat when they came home from school.

This dessert is like the fudgiest brownie with a built-in chocolate syrup! The consistency is half-cake-like, half pudding-like. The crispy toasted top gives way to tender cake and steamy chocolate goo underneath. Top it off with some freshly whipped cream, and you have . . . well . . . scrummie!!

Disclaimer: This dessert is very, very sweet - hope you have a sweet tooth!! :-)


Chocolate Pudding Scrummie
from my Auntie Moo Moo

1 cup flour
¾ cup sugar
1/2 teaspoon salt
2 teaspoons cocoa powder
2 teaspoons baking powder
½ cup chopped walnuts
½ cup milk
2 tablespoons melted butter
1 teaspoon vanilla

½ cup brown sugar
½ cup white sugar
2 tablespoons cocoa powder
1 cup cold water

Preheat your oven to 350 degrees and grease an 8x8-inch square pan.

In a medium bowl, mix together the flour, sugar, salt, cocoa, baking powder, walnuts, milk, butter, and vanilla. Spread evenly in the bottom of your prepared pan.

Next, mix together the brown sugar, white sugar, and cocoa powder and sprinkle over batter in pan. Pour the cold water over the top, and do not stir!

Bake for 45 minutes. Serve warm or cold - topped with whipped cream or ice cream!


Sunday, August 30, 2009

Beer Dip


As soon as I heard that there was such thing as a "beer dip," I knew I was interested. Two of my favorite things in life are undeniably beer and cheese. Most dishes that bring these two heavenly ingredients together make me an extremely happy camper. After perusing several recipes for this heavenly dish, I decided upon incorporating several of my favorite ingredients into one to-die-for dip.


Beer Dip

2 8-ounce packages cream cheese, softened
2 5-ounce jars of Old English Cheese (or 10 ounces Cheese Whiz)
1 1-ounce package dry ranch dressing mix
1/2 cup beer (go ahead, you can drink the rest)
1/2 cup toasted pecans, roughly chopped
Pretzels, crackers, or chips for dipping

In your microwave, heat the cream cheese and Old English Cheese for about 40 seconds on high. This will make it easier to blend them together, using a whisk, with the ranch dressing. Add the beer gradually as you whisk the mixture together, until you reach your desired consistency for the dip. You may not use it all. If so, feel free to drink the remaining beer.

Pour into the serving bowl. Sprinkle your toasted pecans evenly over the surface of the dip. Chill for 1 hour or up to 2 days. Serve with pretzels, crackers, or chips!

Monday, August 24, 2009

Healthy Crock Pot Chicken


Trying to stay healthy but still love the ease and convenience of a nice, hearty crock-pot dinner? Have I got the recipe for you! This is a rustic, hearty, and flavorful meal that slow cooks to perfection but does not include any of those creamy condensed soups that have a tendency to pack a lot of calories and fat. This is also an extremely versatile recipe - your chicken can be almost any cut, even a whole chicken would work. And as for the veggies? Whatever you have on hand can be thrown on in there - we used onions and potatoes this time, but carrots, celery, even green beans would be delicious.

Healthy Crock Pot Chicken


2-3 medium potatoes, quartered
2-3 small red onions, quartered
Carrots and celery would be good, too, but we didn't have any on hand
2 cups water
1 chicken bouillon cube/packet (sodium-free)
1 tablespoon poultry seasoning
1 dash Worcestershire sauce
1 teaspoon dried parsley
Salt and pepper to taste
2 bone-in chicken breasts (boneless will work, too, but bone-in = more flavor!)

Place the potato and onion wedges in the bottom of your crock pot. Cover with water. Stir in bouillon, poultry seasoning, Worcestershire, parsley, and salt and pepper. Place the chicken breasts on top. Season the meat with salt and pepper to taste. Cover and cook on low for 6-8 hours.

Remove the bones before serving (the meat will be so tender that it should fall right off). Serve the chicken and veggies over cooked brown rice or whole-grain pasta, if desired. Pour some broth over the top for extra flavor.


Made by Lena