Showing posts with label Bread. Show all posts
Showing posts with label Bread. Show all posts
Tuesday, September 22, 2009
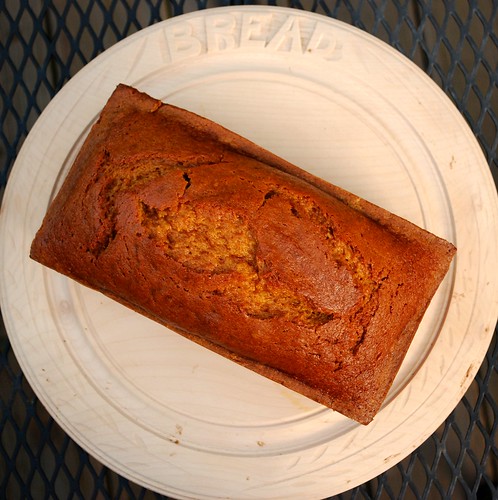
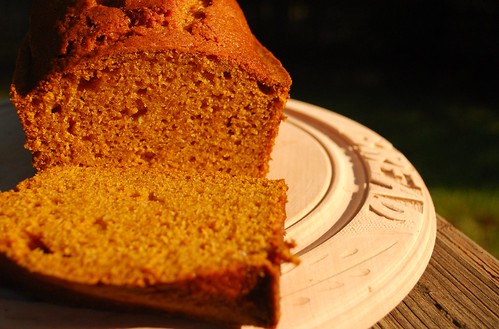
Pumpkin Bread
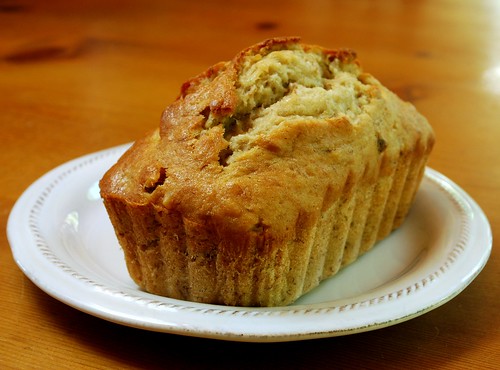
I couldn't say it better than my mom did: It's fall!! It's time for Pumpkin Bread!!
Here is what she wrote to me in an email when I asked her about the history behind her delicious pumpkin bread.
Yes it is definitely time for pumpkin bread! This is the recipe from the mother (Rose) of a very good friend of Nanny's. Nanny would make this and send it to me when I was in college back in the sixties. I think it is the only pumpkin bread recipe I've ever seen that does not include cinnamon. Although cinnamon makes for a great pumpkin experience, leaving it out seems to allow the pumpkin to shine.
Rose's Pumpkin Bread
3 cups sugar
1 cup vegetable or canola oil
4 eggs
1 teaspoon salt
1 teaspoon nutmeg (fresh grated nutmeg is best!)
2/3 cup water
2 cups pumpkin (1 15-ounce can pumpkin will work)
3 1/2 cups flour
2 teaspoons baking soda
1 cup chopped pecans (optional)
Preheat your oven to 350 degrees and grease 2 large loaf pans (9" by 5") and set aside.
In a large mixing bowl, mix all ingredients together and beat for 2 minutes with electric mixer until smooth. Divide into the loaf pans. Each pan will be about 2/3 full.
Bake for 50-60 minutes. Make sure center is done - a toothpick inserted into the center should come out clean.
Note: This bread freezes very well.
Note: For muffins, bake at 350 degrees for 20 minutes.
Note: We have added chocolate chips to this recipe, and it was delicious!
Labels:
Autumn Recipes,
Bread,
Brunch,
Muffins
Tuesday, August 11, 2009
Banana Bread for Life
When people find out that I have a food blog, they wonder why I do what I do. They often say, "Really?! A whole blog just about recipes and food?"
To which I answer, "Yes, a whole blog just about recipes and food."
We food bloggers all have our reasons for doing what we do. For me, it's about reaching out to people around the world and connection with them through the shared experience of food. It's about coming together around the dinner table as a family, as friends, even as an internet community. It's just pretty darn cool that someone in Oregon made my mom's squash casserole for so that their kids would enjoy eating vegetables . . or that someone in England made my zucchini bread for a neighbor who had surgery . . . or someone in Chicago make my mother-in-law's chicken squares to prove to her boyfriend that she could actually cook.
But as much as it is for others that we do what we do, I think we food bloggers have to admit that we do it for ourselves, too. There is something about this blog that feeds my soul, that grounds me, that inspires me. It's an escape for me, but it's also something that centers me and defines me. These recipes are part of my most sacred and precious memories - they are part of my family.
But despite all this . . . for the most part, we food bloggers don't "get personal." And I think that's why this food blogger's story struck such a chord with me.
You need to go read Jess' story to truly understand. But in some strange way, blogging about "just food and recipes" has a way of strengthening us and providing that nourishment in life that only the exercise of creativity and community can provide, so that we have the courage to face the big life challenges that present themselves in "the real world."
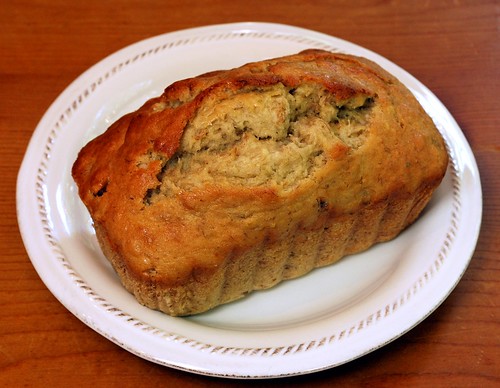
So . . . Jess, this banana bread is for you! I know you say it's a food of departure, but here's hoping that this post will be a warm and comforting welcome home, as well . . .
And, dear readers, think of this as your little reminder that miracles happen every day - sometimes in the kitchen, and sometimes out there in our everyday lives.
Banana Bread with Cinnamon Crumble Topping
Adapted from Sweet Amandine via Bakesale Betty, as seen in Bon Appetit, September, 2008
1 ½ cups flour
1 cup granulated sugar
1 teaspoon ground cinnamon
1 teaspoon baking soda
½ teaspoon salt
1 cup mashed ripe bananas (about 3 medium bananas)
2 large eggs
½ cup vegetable oil
¼ cup honey (local is best!)
¼ cup water
2 tablespoons granulated sugar
2 ½ tablespoons packed golden brown sugar
1 teaspoon cinnamon
1/4 cup finely chopped walnuts (my addition - totally optional)
Preheat your oven to 350 degrees; grease well and flour a 9x5 inch loaf pan.
In a medium bowl, combine the flour, sugar, cinnamon, baking soda, and salt. In a large bowl, whisk the mashed bananas, eggs, oil, honey, and water until smooth. Add the dry ingredients to the wet, and stir just until combined. Pour the batter into the prepared pan.
Mix together the 2 tablespoons of sugar, the brown sugar, the cinnamon, and the walnuts. Sprinkle the topping evenly over the batter.
Bake the bread for about 60 minutes, until a toothpick inserted into the center comes out clean. Cool in the pan for 30 minutes before removing to a cooling rack.
Friday, July 31, 2009
Strawberry Bread
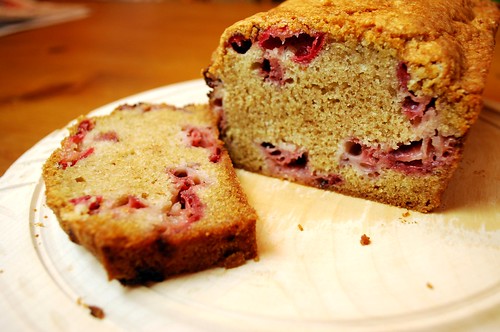
This recipe hadn't been made by anyone in my family in about twenty years - until last week. I made a loaf for hubby and me so that we could have a summery breakfast bread to take on the go in the mornings - and just one bite of this incredibly unique bread took me back to when I was a little girl. So moist and flavorful with a hint of spice, and the bursts of juicy-sweet berries . . .
I had to make it again, this time two loaves! A nice thick slice in the morning with my cup of coffee - the perfect way to start a summer day!
Strawberry Bread
from my mom's friend Alice
2 1/2 cups strawberries, chopped (frozen strawberries work too!)
2 tablespoons sugar
3 cups all-purpose flour
2 cups sugar
1 teaspoon baking soda
1 teaspoon salt
1 teaspoon ground cinnamon
4 eggs, beaten
1 ¼ cup vegetable oil
1 teaspoon vanilla
In a medium bowl, mix the strawberries with the 2 tablespoons of sugar. Cover and refrigerate for at least 30 minutes, until the juices start flowing!
Preheat your oven to 350 degrees. Grease well two 8x5-inch loaf pans. Combine first 5 ingredients in large mixing bowl; make a well in the center. In a separate bowl, combine remaining ingredients (except strawberries), stirring just until combined.
Gently fold in the strawberries with their juices. Divide evenly between the prepared loaf pans, and bake for 55-60 minutes, or until a toothpick inserted into the center of the loaves come out clean. Cool for 10 minutes and then remove to racks.
Note: this recipe also makes great muffins. Fill muffin cups almost full and bake for 20-25 minutes.
Labels:
Berries,
Bread,
Brunch,
Spring and Summer,
Strawberries
Tuesday, July 7, 2009
Swirled Marble Rye Bread
As any Seinfeld fan will tell you, a good loaf of marble rye bread is a hard thing to find - but a precious treat to enjoy if you're lucky enough to find one! This recipe is a keeper!!! It was very easy to make - I had so much fun swirling the doughs together. We made sandwiches with pimento cheese out of this as we lounged by the pool over the holiday weekend - hello! Delicious.
Marble Rye Bread
adapted from the Bread Baker's Apprentice
1 1/2 cups of white rye flour
3 cups unbleached bread flour
2 teaspoons salt
1 3/4 teaspoons instant yeast
1 tablespoon molasses
2 tablespoons shortening
1 1/4 cups water, at room temperature
1 1/2 cups white rye flour
3 cups unbleached bread flour
2 teaspoons salt
1 3/4 teaspoons instant yeast
1 tablespoon molasses
2 tablespoons shortening
1 1/4 cups water, at room temperature
3 tablespoons cocoa powder dissolved in 3 tablespoons of water
1 egg
1 teaspoon water
First, make the light rye. Stir together the rye, the bread flour, the salt, and the yeast. Add the molasses, shortening, and water. Mix until the dough forms a loose ball, adding an additional tablespoon of water or two if necessary to bring the dough together. Knead for 4-6 minutes, adding flour as necessary. The dough should feel supple and pliable but not sticky. Lightly oil a large bowl and transfer the dough to the bowl, rolling to coat it all over. Cover and set aside.
Next, make the dark rye. Stir together the rye, the bread flour, the salt, and the yeast. Add the molasses, shortening, water, and cocoa powder mixture. Mix until the dough forms a loose ball, adding an additional tablespoon of water or two if necessary to bring the dough together. Knead for 4-6 minutes, adding flour as necessary. The dough should feel supple and pliable but not sticky. Lightly oil a large bowl and transfer the dough to the bowl, rolling to coat it all over. Cover and set aside.
Ferment both doughs at room temperature for about 1 1/2 hours, or until they double in bulk.
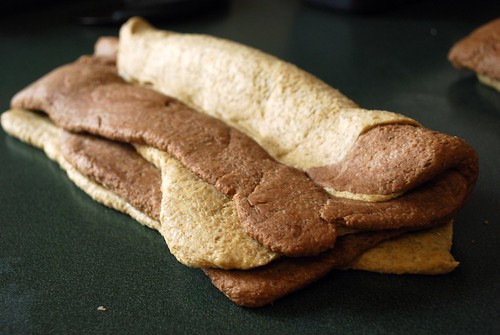
Next, turn each of the doughs out onto a lightly floured surface, and divide each color into 4 equal segments. For a spiral shape, take 2 pieces of light rye and 2 pieces of dark. Use a rolling pin to roll them out into rectangles approximately 8" by 5" in size. Layer the four rectangles so that the colors alternate, making sure that the light rye is on the bottom. Starting on the long side of the rectangle, fold about 1/3 of the dough towards you, pinching the dough down to form a seam like this:
Next, take the other long edge of the rectangle, and fold it up and over the rolled-up dough, again pinching the edge to form a seam. The entire outside of the roll should be covered in the white rye, stretched around the inside layers.
Repeat this shaping process with the other 4 pieces of dough so that you have 2 loaves. You can place them on a large baking sheet lined with parchment or into well-oiled loaf 8x5" loaf pans like so.

Mist the loaves with oil and cover with plastic wrap. Proof at room temperature for 60-90 minutes, or until the loaves double in bulk.
(Alternatively, you can refrigerate the dough for up to 2 days before proofing and baking.)
Preheat your oven to 350 degrees. In a small bowl, whisk the egg with the 1 teaspoon of water, and lightly brush the loaves with this egg wash. Bake on the middle rack for about 45 minutes, or until the internal temperature of the bread is 190 degrees (you can use a meat thermometer or a fancy bread thermometer for this). Remove immediately from the pans and cool on a rack for 1-2 hours before slicing or serving. Enjoy!!
Labels:
Bread
Tuesday, June 30, 2009
Cinnamon Rolls with Maple Glaze
I made a few changes to a very trusty cinnamon roll recipe, and the results were delicious. I sold pans and pans of these happy little buns at the Farmer's Market last weekend. They were a big hit! Buttery, rich, and delicious with a delicate maple glaze on top.
Cinnamon Rolls
adapted from the Bread Baker's Apprentice
6 1/2 tablespoons granulated sugar
1 1/2 teaspoons of fine sea salt
5 1/2 tablespoons butter flavored shortening
1 large egg, lightly beaten
1 teaspoon vanilla extract
1 1/2 cups unbleached bread flour
2 cups unbleached all-purpose flour
2 teaspoons instant yeast
1 1/4 cups whole milk
6 tablespoons sugar
1 1/2 tablespoons ground cinnamon
1 cup powdered sugar
3-4 tablespoons pure maple syrup
In an electric mixing bowl, cream the sugar, salt, and shortening. Add the egg and the vanilla extract and continue to beat until light and fluffy. Finally, add the flour, the yeast, and the milk to the mixture and blend until a soft dough forms. Use your dough hook to knead the dough at medium speed for about 10 minutes, or knead by hand on a lightly floured surface for 12 minutes. The dough should be supple and tacky, but not sticky. As you knead, add flour or water as needed to obtain this consistency in the dough.
Oil a large bowl and transfer the dough into it, turning to coat. Cover with plastic wrap and allow the dough to rise for about 2 hours, or until the dough has doubled in bulk.
Mist your clean counter with cooking spray and transfer the dough onto the counter. Roll your dough out into a large rectangle, about 9 inches by 18 inches. In a small bowl, combine the cinnamon and sugar. Sprinkle evenly over the dough.
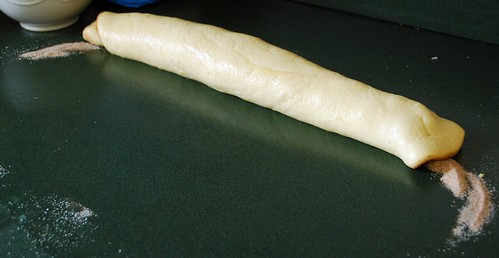

Next, roll the dough upstarting at one of the longer ends and finishing at the other end. Place the dough seam-side down on the counter.

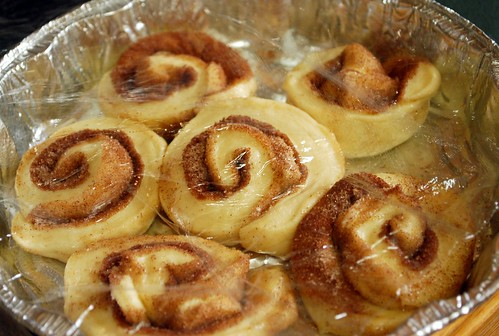
Using a sharp knife, slice the dough into rolls about 1" thick and place the rolls onto a greased baking sheet or round oven-safe dish, about 1/2" apart. Cover with saran.
At this point, you can either refrigerate your rolls for up to 2 days if desired. If you do this, then remove the rolls from the refrigerator about 3-4 hours before you plan to bake them so that they can come to room temperature and rise.
Otherwise, go ahead and allow the shaped rolls to rise for 75-90 minutes, until they double in size.

Preheat your oven to 350 derees. Bake the rolls for about 20 minutes. or until they begin to turn golden brown. Cool for 10 minutes before removing them to a cooling rack.
In a small bowl, combine the powdered sugar and maple syrup, mixing to form a thin glaze. Drizzle over the warm buns just before serving. Enjoy!
In a small bowl, combine the powdered sugar and maple syrup, mixing to form a thin glaze. Drizzle over the warm buns just before serving. Enjoy!
Monday, June 29, 2009
My Best Banana Nut Bread
Dear readers, this past weekend was my very first farmers market selling bread on our town square. It was so much fun! The whole experience was an all-around success. I made new friends, got to know some local farmers, and even traded a few loaves for some fresh produce for next week's baked goods!
In preparing for this fun adventure, I went to some of my tried-and-true go-to recipes. Here is my very best banana nut bread. I've been making it for 10 years or so, and it's evolved with tweaks here and there. These little babies sold like hotcakes on Saturday morning!
My Best Banana Nut Bread
originally based on a recipe from Allrecipes.com
1 3/4 cups all-purpose flour
2 teaspoons baking powder
1/4 teaspoon baking soda
1/2 teaspoon salt
1/2 teaspoon cinnamon
A pinch of nutmeg
2/3 cup sugar
1/3 cup butter, softened
2 eggs
1 1/4 cup mashed banana
1 teaspoon vanilla
1/2 cup chopped walnuts (optional)
Preheat your oven to 350 degrees. Grease a loaf pan and set aside.
Sift together the flour, baking powder, soda, salt, cinnamon, nutmeg, and sugar in a large bowl. Add the butter, eggs, banana, and vanilla, mixing just until combined. Stir in the nuts, if desired.
Pour the batter into the prepared loaf pan and bake for 50-55 minutes or until a toothpick inserted into the bread comes out clean. Cool in the pan for 10 minutes before turning out onto a cooling rack. Enjoy!
Tuesday, June 23, 2009
Blueberry Streusel Muffins
Growing up in Atlanta, we lived next door to a wonderful family - the Fullers. They had a son my older brother's age and a daughter my age. Their daughter and I were both blond little babies, and our moms would dress us in the same outfits from Laura Ashley, send us to ballet class together, and let us have sleepovers. We were flippin' adorable!
Our families were together so often, that we got to call Mrs. Fuller "Mom Fuller" - since she was our "other" mom. Even now that we are all grown up (well, mostly grown up!), our families remain close. So here is a wonderful recipe from my "other" mom - Mom Fuller's Blueberry Streusel Muffins!
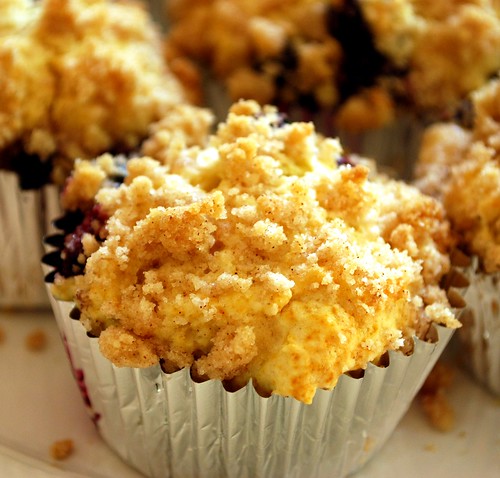
Don't you love that blueberry running down
my oh-so retro-foil muffin liner?
Try not to drool on your keyboard, kay?
my oh-so retro-foil muffin liner?
Try not to drool on your keyboard, kay?
Blueberry Streusel Muffins
recipe from Mom Fuller
1/3 cup sugar
1/4 cup butter, softened
1 egg
2 1/3 cups flour
4 teaspoons baking powder
1/2 teaspoon salt
1 cup milk
1 teaspoon vanilla
1 1/2 cups blueberries
1/2 cup sugar
1/3 cup flour
1/2 teaspoon cinnamon
1/4 cup butter, softened
Preheat your oven to 375 degrees, and grease or line 18 muffin cups.
In an electric mixer bowl, cream sugar and butter until light and fluffy. Add egg and beat until well-combined.
In a seperate bowl, combine flour, baking powder and salt. Add to creamed mixture alternately with milk, stirring well after each addition.
Finally, stir in vanilla and blueberries. Spoon batter into greased or lined muffin cups, filling two-thirds of the way full.
For topping, combine the sugar, flour, and teaspoon cinnamon. Cut in the butter with a fork or pastry blender until mixture resembles crumbs. Sprinkle on top of muffin batter.
Bake at 375 degrees for 25 - 30 minutes or until golden brown. Yield ~ 18 muffins.
Sunday, May 24, 2009
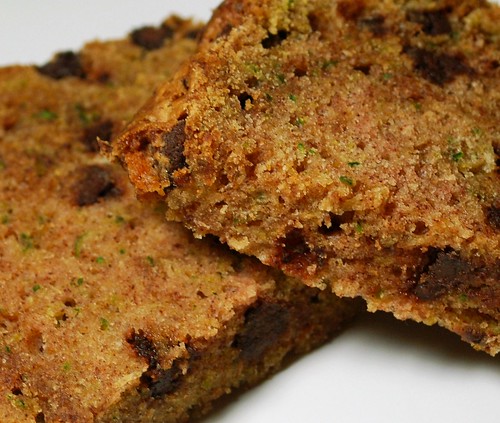
Zucchini Bread with Chocolate Chips
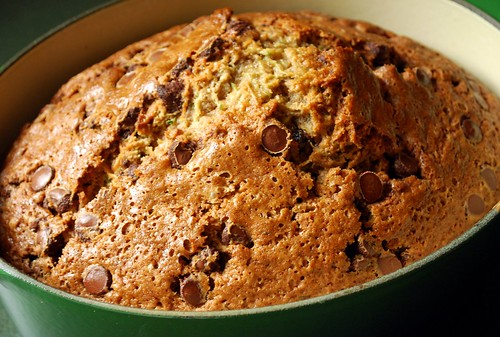
This wonderfully moist zucchini bread was a staple in our house growing up. My mom got the recipe from a friend who she used to volunteer with about 30 years ago. I decided to add a bit of pizazz to to this tried-and-true recipe by adding some chocolate chips. Delicious!!!
Zucchini Bread with Chocolate Chips
from my mom's friend Val
3 eggs
2 1/4 cups sugar
1 cup oil
3 teaspoons vanilla
3 cups flour
1 teaspoon salt
1 teaspoon baking soda
1/4 teaspoon baking powder
3 teaspoons cinnamon
2 cups finely grated zucchini
1 1/4 cups semi-sweet chocolate chips (optional)
1 cup walnuts or pecans, toasted (optional)
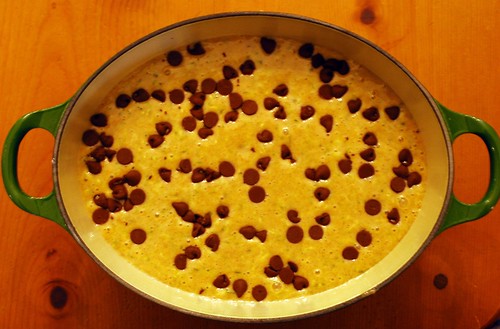
Grease 2 loaf pans and preheat your oven to 350 degrees. In a large mixer bowl, beat together the eggs, sugar, oil, and vanilla. In a separate bowl, sift together the flour, salt, soda, powder, and cinnamon. Add to the egg mixture and stir just until combined. Fold in the zucchini, 1 cup of the chocolate chips and the nuts, if desired. Pour mixture evenly into the prepared pans. Sprinkle the remaining 1/4 cup of chips on top.
Bake for 45 - 50 minutes. Watch carefully and test for done-ness with a toothpick. Let cool for 10 minutes, then remove from pan and cool completely on racks. Also freezes well.
Thursday, May 21, 2009
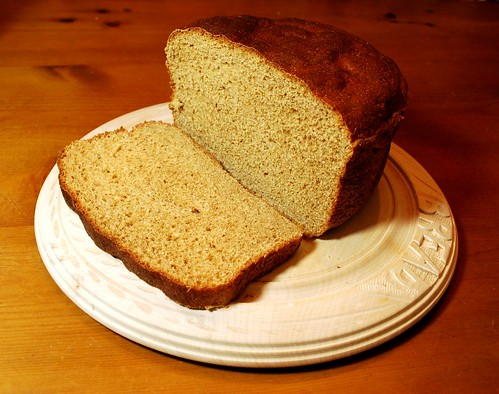
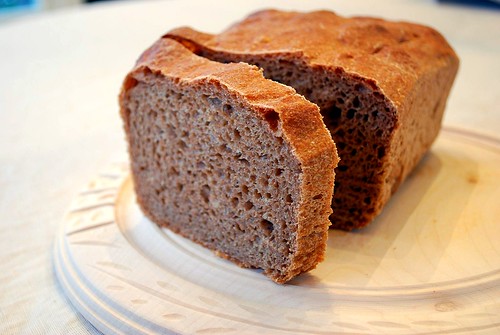
Whole Wheat Oat Bran Bread
Look for more of my bread recipes over the next several weeks as I gear up to sell some at our local farmers' market next month! There's just nothing like a fresh, home-baked loaf of bread, ya know?
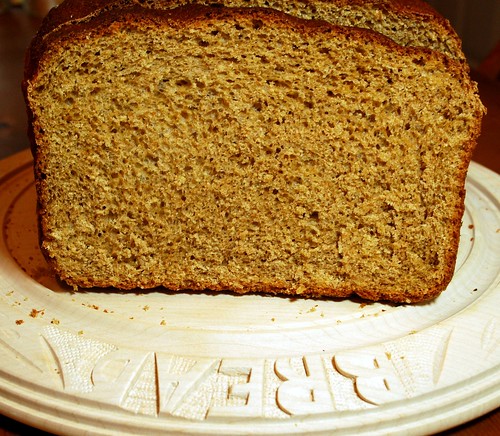
This is a moist and chewy bread with lots of body. The whole grains give it a lot of flavor and texture, but they are light enough to not weigh the bread down too much. The fine texture of the grains makes it a perfect sandwich bread - or perhaps a piece of toast with butter and jam?
Whole Wheat Oat Bran Bread
Inspired by the Secrets of Jesuit Breadmaking
2 tablespoons active dry yeast
3 cups whole wheat flour
1 tablespoon salt
5 tablespoons butter
2 1/2 cups milk
1/3 cup molasses
1/3 cup honey
1 1/2 cups oat bran
2 eggs
2-3 cups bread flour
Combine the whole wheat flour, yeas, and salt in a large mixing bowl.
In a medium saucepan, heat the butter, milk, water, molasses, and honey until warm - the butter should partially melt. Pour into the whole wheat mixture and stir well. Stir in the oats and the eggs. Beat the mixture for 10 minutes, gradually adding bread flour until the bread dough begins to pull away from the sides of the mixing bowl.
Turn the dough out onto a lightly floured surface and knead for 8-10 minutes, until it feels smooth and elastic. Add flour as necessary to prevent stickiness.
Lightly oil a large bowl and place the dough in it, turning to coat. Cover and let the dough rise in a warm, draft-free place for about 1 1/2 hours, until it is doubled in bulk.
Gently punch down the dough with your fist, divide the dough into thirds, and shape into the desired forms on greased baking sheets or shape and place into greased loaf pans. Cover with a tea towel and let the dough rise a second time until doubled in bulk - it should take about 45 minutes.
Preheat your oven to 375 degrees and bake the loaves for 30-35 minutes. Transfer to a wire rack to cool.
Labels:
Bread,
Brunch,
Healthy,
Non-Veggie Sides
Tuesday, April 21, 2009
God Save the Queen
Today is Her Royal Highness Queen Elizabeth II's actual birthday, and my mom and I decided to make some truly authentic English scones in celebration!
So you already know by now that my family is mostly Irish, but my my maternal grandmother, Nanny, represents our English branch of the family, and my mom's whole family grew up in Canada. Well, last night, she told me the story of when she was a little girl in her hometown of Montreal anticipating a visit from QEII. Her family and many others waved to the Queen as she traveled through town on this special visit, and here is the pin my mom wore in honor of the occasion:
So you already know by now that my family is mostly Irish, but my my maternal grandmother, Nanny, represents our English branch of the family, and my mom's whole family grew up in Canada. Well, last night, she told me the story of when she was a little girl in her hometown of Montreal anticipating a visit from QEII. Her family and many others waved to the Queen as she traveled through town on this special visit, and here is the pin my mom wore in honor of the occasion:
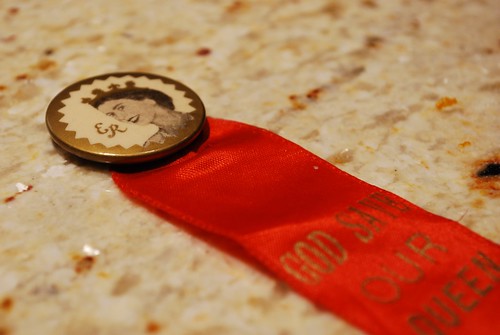
She keeps this pin (and a few other memorabilia) in her dining room next to a framed photo of the Queen. She used these when we were growing up, and my mom was trying to teach me and my two rambunctious brothers our table manners. Whenever we put our elbows on the table, chewed with our mouths open, or used our fingers as utensils, she would point to the framed photo and scold, "What would the QUEEN say!?" If you've ever dined with our family, you can tell that this tactic didn't work that well, ;-) but how adorable is my mom?!?
Dear readers, I also have to tell you that my mom and I firmly believe that we are closely intertwined with the royal bloodline. I will let you be the judge, but doesn't my grandmother Nanny look like the spitting image of the Queen???
Dear readers, I also have to tell you that my mom and I firmly believe that we are closely intertwined with the royal bloodline. I will let you be the judge, but doesn't my grandmother Nanny look like the spitting image of the Queen???
The Queen ~***~ Nanny
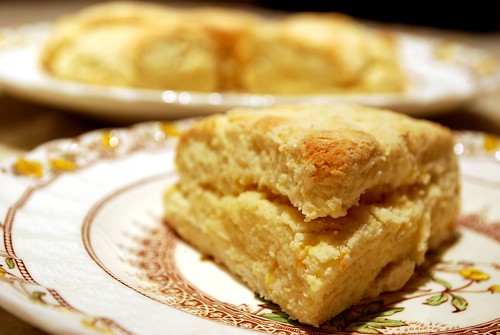
Okay, so back to the scones. These are the most light, fluffy, and moist scones I have ever tasted outside of the British Isles. What Americans can't seem to understand is that a scone is NOT supposed to be heavy with a texture resembling that of a brick. What you're buying at Starbucks is NOT a scone, dear readers, it's a stone.
Authentic scones are light as air, with a tender, flaky crumb. They melt in your mouth like a slightly sweet biscuit. They don't crunch like a piece of biscotti. I was so excited to find this recipe on Four Obsessions - it comes straight from her "British mum." I substituted cream for milk and shortened the baking time just a tad.
Authentic scones are light as air, with a tender, flaky crumb. They melt in your mouth like a slightly sweet biscuit. They don't crunch like a piece of biscotti. I was so excited to find this recipe on Four Obsessions - it comes straight from her "British mum." I substituted cream for milk and shortened the baking time just a tad.
Authentic British Cream Scones
adapted from Four Obsessions
1 3/4 cups flour
1 tablespoon baking powder
1/2 teaspoon salt
1/4 cup sugar
1/4 cup butter
1 cup dried fruit (optional)
1/3 cup heavy cream
1 large egg
Preheat oven to 425 degrees. Sift together the flour, baking powder, salt, and sugar. Cut in the butter until it's chunky.
Then use your fingers to flatten the buttery bits into flakes, but don't over-do it. It should not be as fine as cornmeal (like when you're making biscuits) or else your scones will be heavy. Stir in the dried fruit, if desired.
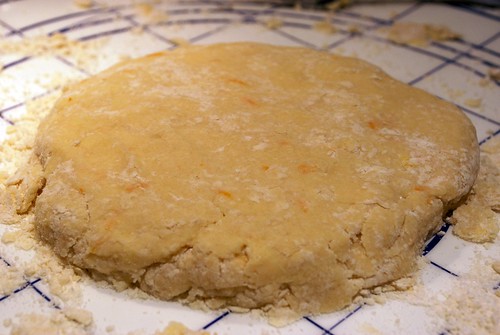
Combine the cream and the egg, beating lightly. Add to the flour mixture and stir with a fork very lightly. Turn the crumbly dough out onto a floured surface and knead gently 5 to 6 times, just until the dough comes together.
Pat into a circle about 1-1.5 inches thick. Use a sharp knife to cut into 6 wedges. Place the wedges on a greased cookie sheet, and bake for 12-15 minutes. The tops will turn lightly golden. Allow to cool for 10 minutes.
Serve warm with clotted cream, butter, jam, and/or lemon curd.
A note on dried fruit and other additions:
We made our scones plain today because we were so excited about topping them with Devonshire cream on other goodies, but here are some other ideas for additions.
- Currants are the traditional route for scones.
- Dried pears with crystallized ginger
- Dried peaches and dried cranberries
- Chopped dried cherries (especially good with orange zest)
- Chopped dried cherries with chocolate chunks
- Fresh or dried blueberries (especially good with lemon zest)
- Combination of raisins (golden, dark, etc.)
Monday, April 13, 2009
Outrageously Moist Banana Nut Bread
Banana bread should be many things. It should be very banana-y. It should be a beautiful golden brown. It should be studded with toasty nuts or melty chocolate chunks. It should be fresh, flavorful . . . homey. Must most of all? Banana bread should be outrageously, unbelievably moist.
from BakeWise by Shirley O. Corriher
1 1/2 cups pecans
1 tablespoon butter
3/4 teaspoon salt, divided
1 3/4 cups flour
1 teaspoon baking powder
1/4 teaspoon baking soda
1 1/2 cups sugar
1 pinch cinnamon
1/2 cup canola oil
1 teaspoon vanilla extract
2 large eggs
1/2 cup buttermilk
2 cups mashed ripe banana
1/2 cup heavy cream
Place your oven shelf in the lower third of your oven, and preheat 350 degrees.
Arrange the pecans evenly on a large baking sheet. Place in the preheated oven and roast the nuts for about 10 minutes, until fragrant and lightly browned. Remove from the oven and stir in the butter and 1/4 teaspoon of the salt. Then allow the nuts to cool. Chop coarsely, and set aside.
Turn your oven up to 375 degrees now. Apply cooking spray and flour to a loaf pan. In a large bowl, combine the flour, baking powder, baking soda, sugar, and cinnamon. In a separate bowl, combine the oil, vanilla, eggs, buttermilk, and bananas. Form a well in the middle of the flour mixture, and pour the liquid ingredients into the well. Stir until just incorporated.
Use an electric mixer to whip the whipping cream until it forms soft peaks. Fold the whipped cream gently into the batter. Add the nuts and fold those in as well.
Pour batter into the prepared loaf pan and bake for about 35 minutes, until the loaf is a light golden brown and a toothpick inserted into the center comes out clean. Allow to cool for 10 minutes before removing the bread from the pan. Then let it cool completely before slicing. Enjoy!
Sunday, March 22, 2009
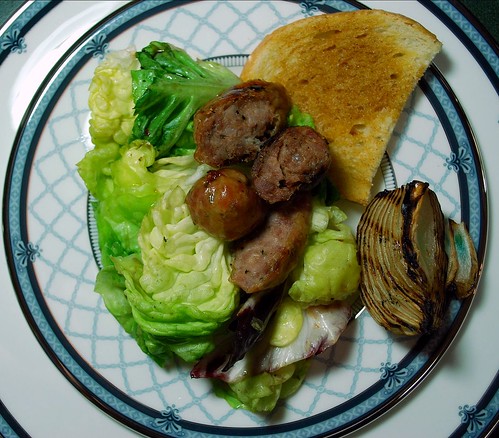
Grilled Salad with Sweet Italian Sausage
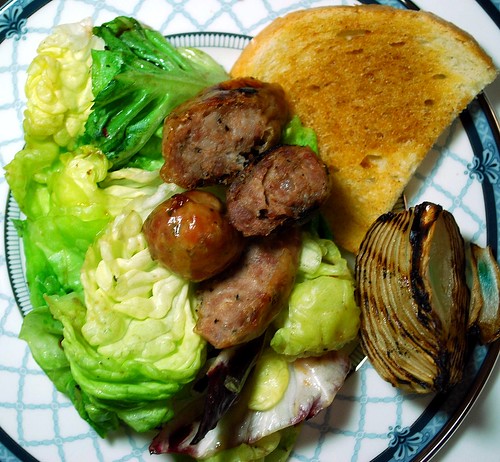
Here is the salad that we served during our wine-tasting party. It paired beautifully with the La Crema Pinot Noir. Everyone loved the ginger crostini in this salad - and you will not believe how easy it was to make. This would be a perfect salad to serve at a cook-out - the grilled flavors of the sausage and the onion are complimented so beautifully by the balsamic.
Grilled Salad with Ginger Crostini
Adapted from Rachel Ray
4 tablespoons extra virgin olive oil
3 teaspoons ground ginger
6-8 slices crusty white bread
1 pound sweet Italian pork sausages
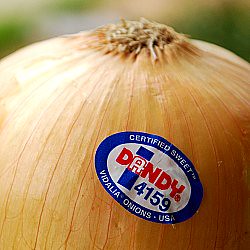
2 medium sweet onions, peeled and quartered
3 tablespoons balsamic vinegar
8 cups mixed greens
1/4 cup balsamic vinaigrette (recommended: Newman's Own)
Preheat oven to 300 degrees. In a small bowl, mix together the olive oil and the ground ginger. Brush the ginger mixture generously on the bread slices. Place them on a baking sheet, and bake until toasted and crispy, about 15 minutes.
Meanwhile, using a grill, grill pan, or George Foreman, cook the sausages over medium-high heat, turnning as necessary, until browned and crispy on all side, about 15-20 minutes.
Pour the balsamic vinegar over the onion wedges. Grill on both sides over medium-high heat for about 4 minutes on each side. The wedges should become soft and slightly charred.
In a large bowl, toss the greens with the balsamic vinaigrette until the greens are lightly coated. Divide the salad into 6-8 portions, topping each with a grilled onion wedge and a ginger crostini. Slice the sausages diagonally and divide the pieces among the salads. Serve immediately, and enjoy!
Wednesday, March 18, 2009
100% Pure Love
This is the 100th Vintage Victuals post!!!
In celebration of this momentous occasion, dear readers, I am happy to share with you a fantastic recipe for 100% Whole Wheat Bread. I'm also pleased to announce my very first VV Giveaway!!
The recipe in this post comes from one of my all-time favorite cookbooks - packed with vintage recipes, of course! It's the Secrets of Jesuit Breadmaking, and you can win this cookbook from Vintage Victuals! The Jesuits have a special place in my heart, as I am, in fact, the product of a Jesuit college education. You may recognize this book from earlier posts on Vintage Victuals.
This is a great resource full of tried-and-true bread recipes that one Jesuit priest gathered from Jesuits around the world through the course of his career as a Jesuit cook. It is also chock full of great breadmaking tips and cute stories about the origins and stories that each recipe brings to the writer's mind. It reminds me a lot of what I love best about cooking and baking - the stories and families that come together around food.
To win this cookbook, all you have to do is leave a comment on this blog post answering the following question: What is your favorite family recipe or traditional dish?
Your comment must be posted by Sunday, March 22, 2009 at 11:59 PM EDT. One winner will be randomly chosen by Random.org's Interger Generator based on the number of your comment and will be announced on Monday, March 23, 2009. Good luck!
EDIT: I've gotten reports from 2 or 3 of you that you've had problems leaving a comment. I think I've fixed the glitch, but if you still have problems, then please email me and I will assign you a number for the giveaway!!
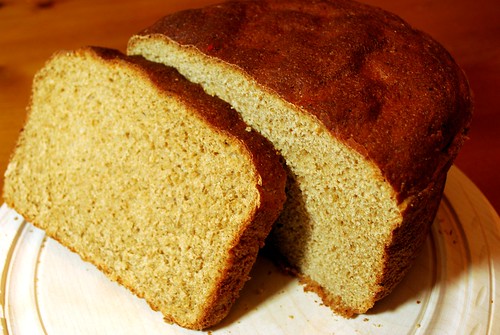
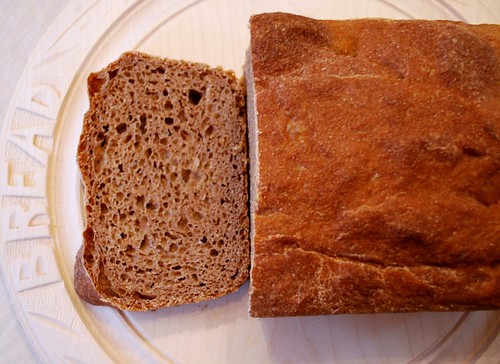
Now back to the recipe! This is the whole wheat bread of my DREAMS. Soft, moist, dense, and hearty. Nutty and malty but mild and ever-so-slightly sweet. It toasts up perfectly with a pad of butter and a drizzle of honey. It also makes for an unbelievable turkey sandwich. Chalk up another one for the Jesuits!
100% Whole Wheat Bread
from the The Secrets of Jesuit Breadmaking
1 tablespoon active dry yeast
2 1/2 cups warm water
3 tablespoons vegetable oil
2 tablespoons honey
1 tablespoon molasses
2 teaspoons salt
5-6 cups 100% whole wheat flour (recommended: King Arthur)
First, make the "sponge." In a large mixing bowl, combine the yeast and the warm water and stir until the yeast dissolves. Next, stir in the oil, the honey, the molasses, and the salt. Gradually stir in about 2 1/2 cups of the flour. The dough will be wet and soupy, but a bit spongy. Cover with plastic wrap, and let the sponge ferment for 1 hour.
Next, stir down the sponge, breaking all the bubbles up with a wooden spoon. Using an electric mixer, beat the sponge for 10 minutes, gradually adding about 2 more cups of the flour. The dough should become very thick and tacky, and it should begin to pull away from the sides of the bowl.
Turn the dough out onto a lightly floured board. The dough will be heavier than regular white-floured doughs. Knead for at least 8-10 minutes, adding flour as needed to prevent stickiness. It should feel smooth and elastic.
Spray a large bowl with cooking spray. Place the kneaded dough into the bowl, turning it to coat the dough on all sides with the oil. Cover with plastic wrap and allow it to rise for at least 1 1/2 hours in a warm, draft-free place. The dough will double in size.
Meanwhile, grease two 9x5-inch loaf pans. When dough has risen, punch it down gently. Divide the dough in half and shape each into loaves. Place them into the prepared pans. Cover with a tea towel and allow to rise again for about 45 minutes, until doubled in bulk.
Preheat your oven to 350 degrees. Bake the loaves for 40 minutes. Transfer to wire racks to cool. When loaves have cooled completely, then you can slice them up and enjoy!
Saturday, March 14, 2009
May the Rain Fall Soft Upon Your Fields
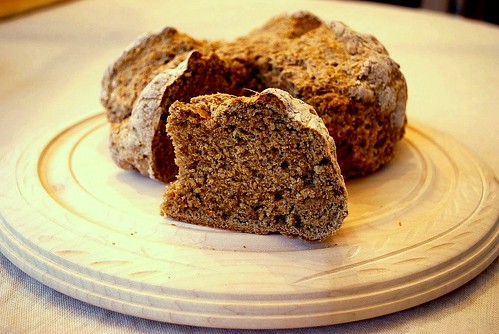
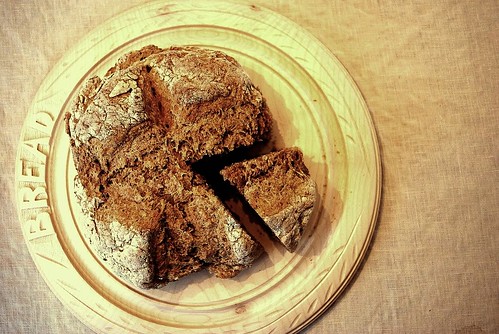
Happy St. Patrick's Day, dear readers! As I may have mentioned before, I come from a very strong Irish bloodline, and March 17th is a day to celebrate. Tonight we celebrated our Irish heritage a few days early with wonderful friends and delicious food. I was in charge of the soda bread. I found a great recipe in a book I found recently at a book fair. It was a major crowd pleaser and an excellent accompaniment to our corned beef and cabbage!
Hearty, dense, and full of wheaty flavor, this bread is as close as you will come to the staple on Irish tables across the green countryside each and every day. It is a quick-bread, made without yeast. It has a delicate crumb with a wonderfully grainy texture. The whole wheat flour gives it a soft nutty flavor. I can't wait to toast a piece for breakfast tomorrow morning - with a tab of butter and a drizzle of honey, perhaps?
Irish Brown Soda Bread
from the Frugal Gourmet on Our Immigrant Ancestors: Recipes You Should Have Gotten from Your Grandmother, by Jeff Smith
2 cups of flour
3 cups whole-wheat flour
2 teaspoons baking soda
1 tablespoon baking powder
2 tablespoons brown sugar
2 1/4 cups buttermilk
Preheat oven to 400 degrees.
Measure all dry ingredients into a large mixing bowl, combining well and making sure that there are no lumps of brown sugar. Pour in the buttermilk and stir with a wooden spoon just until a soft dough forms.
Turn the dough out onto a lightly floured surface and knead for about a minute until the dough comes together. Divide the dough in half, and press down on the top of each half to flatten. Place the two loaves on a large ungreased baking sheet - preferably non-stick. Sprinkle the tops of the loaves with a little bit of flour, and, using a sharp knife, mark the shape of a cross on the top of each loaf.
Allow the two loaves to rest for at least 10 minutes before baking. Bake on the middle-rack of the oven for about 40-45 minutes, or until the crust is toasty, brown, and crunchy.
Cool on racks and serve with Irish butter.
Labels:
Bread,
Brunch,
Hors d'oeuvre,
Non-Veggie Sides
Subscribe to:
Posts (Atom)


