Showing posts with label Fruit. Show all posts

Monday, September 21, 2009

Nanny's Fresh Blueberry Pie


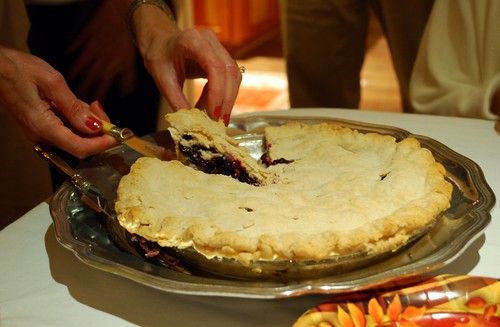
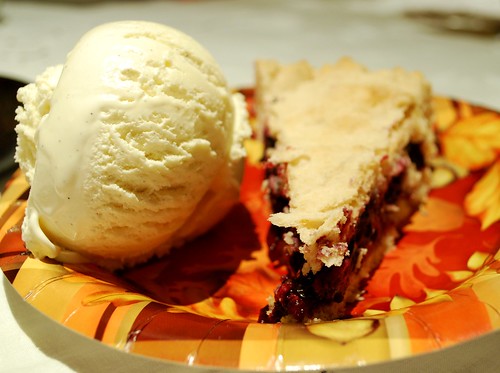
Aaaahhh, the end of the summer. Tomorrow marks the first day of fall here in Georgia. Last night, the hubs and I enjoyed such a lovely evening at my parents' house in Atlanta. And Nanny herself was there with one of her famous pies.

I admit it, dear readers: I've been holding out on you.

I've been saving some of the best of the best recipes in my family . . . saving them for a rainy day. Well, I'm not sure whether you've heard, but it's raining buckets here in drought-ridden North Georgia, so it's about time for me to share one of these precious gems with you all!

My sweet grandmother "Nanny" is famous for her pies. In the summertime, it's all about the blueberries . . . Nanny's fresh blueberry pie is delicious enough to bring tears to your eyes . . . and yet so wonderful in its simplicity. I think that most of Nanny's recipes shine through in their beautiful simplicity - truly highlighting the fresh ingredients without need for masking them with a myriad of distracting flavors.

So here is my gem for you today, dear readers, as the rain pours down over Georgia. Happy autumnal equinox - have a slice of pie!


Nanny's Fresh Blueberry Pie

Pastry:
2 cups flour
1 teaspoon baking powder
1/2 teaspoon salt
6 ounces of shortening
2 ounces of ice cold water

Filling:
4 cups fresh blueberries
2 tablespoons flour
1/2 cup sugar
1/8 teaspoon salt
1 teaspoon lemon juice
1 tablespoons butter

Preheat your oven to 400 degrees.

For the pastry, sift together the dry ingredients in a large bowl. Add shortening and blend with pastry blender until the mixture reaches the consistency of small peas. Add ice water and chop mixture with a knife. Mix with your hand until a soft ball forms. Separate into halves. Take the first piece and roll in extra flour. Line a 9" pie pan with the first half, leaving a small overlap around the edges of the pie dish. Repeat with the second half of the dough, and set aside.

For the filling, mix flour, sugar, and salt. Sprinkle 1/4 of this mixture on the uncooked bottom crust. Add blueberries. Sprinkle the remainder of the sugar mixture on top. Sprinkle with lemon juice, and dot with the butter. Flute the top crust, pinching it to the bottom crust.

Bake for 15 minutes. Then reduce the heat to 350 degrees, and bake for about 25-30 more minutes, until the berries are tender. Cool before slicing and serve with vanilla ice cream.

Thursday, August 20, 2009

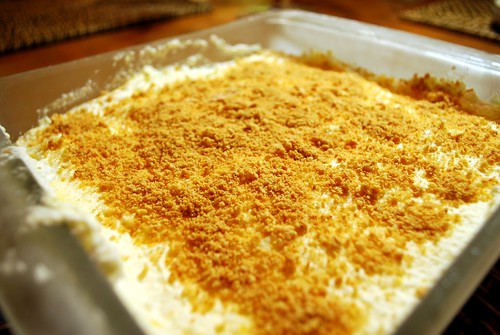
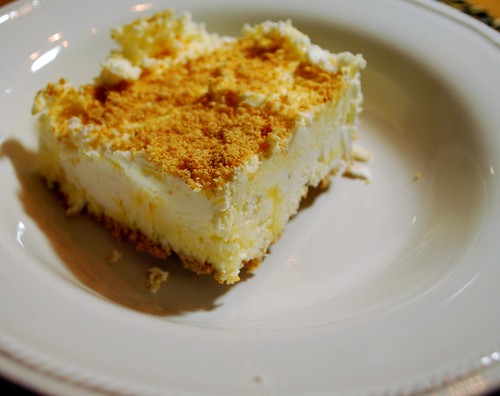
Nanny's Frozen Lemon "Cake"


This sweet is a real treat, y'all.

This recipe comes from my Nanny - my mom's mom. Mom says that her best memories of this "cake" come from her childhood. Nanny and Poppy would have a few other couples over for cocktails and a light late supper, while everyone's kids were already in bed at home with sitters.

Nanny would make this Frozen Lemon Cake for dessert. She made it in those old-fashioned ice cube trays, with the cube insert taken out. She would slice it up and serve it to her guests late at night. Then the next morning, my mom and her sisters would wake up, hoping against hope that a little corner might be leftover for them. Of course, there usually was . . . I like to think that Nanny sliced it that way on purpose.

This frozen treat is light, fluffy, creamy, and it melts in your mouth just perfectly. It's just sweet enough, with a wondurfully cool and refreshing lemon flavor. It's like a little taste of the clouds that angels sit on in heaven.

Frozen Lemon Cake
adapted from Nanny's recipe

1 cup crushed graham crackers, divided
2 tablespoons butter, melted
3 eggs, separated
1 lemon (all juice and all zest)
½ cup sugar
1 cup whipping cream
4 tablespoons sugar, divided

Combine 3/4 cup of the crushed graham crackers with the melted butter, stirring until a crumbly loose mixture forms. Line the bottom of an 8x8-inch pan with the mixture.

In a bowl set over hot water (not boiling) mix egg yolks, lemon juice, lemon zest, and sugar.Stir constantly until the mixture thickens. At this point Nanny's instructions say "Keep cool." - this is because it will take about 10 minutes for the mixture to thicken. Cute. Remove from heat and allow the mixture to cool.

Beat egg whites until light and fluffy. Gradually add 2 tablespoons sugar and continue to beat until glossy, stiff peaks form. Next, beat whipped cream until fluffy, and gradually add 2 tablespoons sugar. Then, gently fold all three mixtures together.

Spread the mixture in the pan over the prepared crust. Sprinkle with the remaining 1/4 cup of crushed crackers. Place in freezer for at least 3 hours. When you're ready to serve, remove from the freezer, and cut into squares and plate them. Then allow to melt ever so slightly - about 4-5 minutes. Serve immediately.

Tuesday, August 11, 2009

Banana Bread for Life


When people find out that I have a food blog, they wonder why I do what I do. They often say, "Really?! A whole blog just about recipes and food?"

To which I answer, "Yes, a whole blog just about recipes and food."

We food bloggers all have our reasons for doing what we do. For me, it's about reaching out to people around the world and connection with them through the shared experience of food. It's about coming together around the dinner table as a family, as friends, even as an internet community. It's just pretty darn cool that someone in Oregon made my mom's squash casserole for so that their kids would enjoy eating vegetables . . or that someone in England made my zucchini bread for a neighbor who had surgery . . . or someone in Chicago make my mother-in-law's chicken squares to prove to her boyfriend that she could actually cook.

But as much as it is for others that we do what we do, I think we food bloggers have to admit that we do it for ourselves, too. There is something about this blog that feeds my soul, that grounds me, that inspires me. It's an escape for me, but it's also something that centers me and defines me. These recipes are part of my most sacred and precious memories - they are part of my family.

But despite all this . . . for the most part, we food bloggers don't "get personal." And I think that's why this food blogger's story struck such a chord with me.

You need to go read Jess' story to truly understand. But in some strange way, blogging about "just food and recipes" has a way of strengthening us and providing that nourishment in life that only the exercise of creativity and community can provide, so that we have the courage to face the big life challenges that present themselves in "the real world."

So . . . Jess, this banana bread is for you! I know you say it's a food of departure, but here's hoping that this post will be a warm and comforting welcome home, as well . . .

And, dear readers, think of this as your little reminder that miracles happen every day - sometimes in the kitchen, and sometimes out there in our everyday lives.

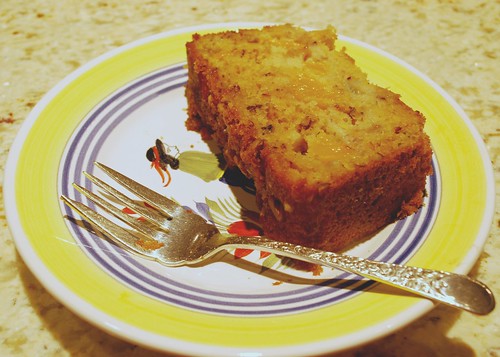
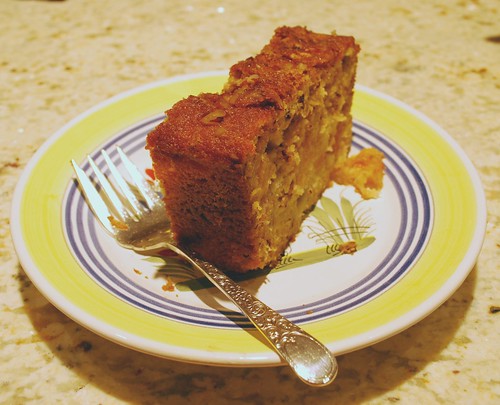
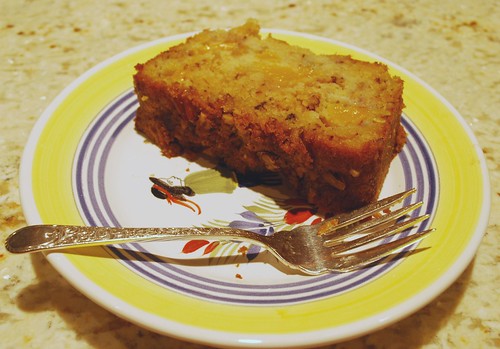
Banana Bread with Cinnamon Crumble Topping
Adapted from Sweet Amandine via Bakesale Betty, as seen in Bon Appetit, September, 2008

1 ½ cups flour
1 cup granulated sugar
1 teaspoon ground cinnamon
1 teaspoon baking soda
½ teaspoon salt
1 cup mashed ripe bananas (about 3 medium bananas)
2 large eggs
½ cup vegetable oil
¼ cup honey (local is best!)
¼ cup water

2 tablespoons granulated sugar
2 ½ tablespoons packed golden brown sugar
1 teaspoon cinnamon
1/4 cup finely chopped walnuts (my addition - totally optional)

Preheat your oven to 350 degrees; grease well and flour a 9x5 inch loaf pan.

In a medium bowl, combine the flour, sugar, cinnamon, baking soda, and salt. In a large bowl, whisk the mashed bananas, eggs, oil, honey, and water until smooth. Add the dry ingredients to the wet, and stir just until combined. Pour the batter into the prepared pan.

Mix together the 2 tablespoons of sugar, the brown sugar, the cinnamon, and the walnuts. Sprinkle the topping evenly over the batter.

Bake the bread for about 60 minutes, until a toothpick inserted into the center comes out clean. Cool in the pan for 30 minutes before removing to a cooling rack.


Thursday, August 6, 2009

Big Brother's Birthday Cake


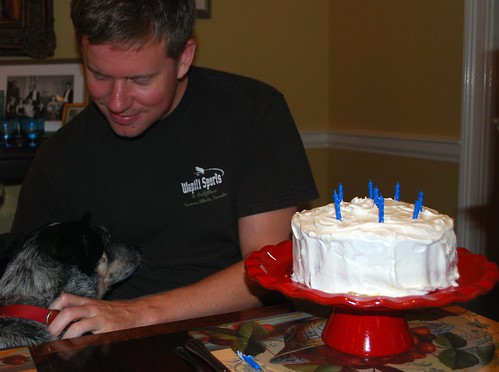
My big brother. Smart, handsome, dentist, bachelor, and now 31 years old. If this sounds like a personals ad, it should. Do you have a lovely lady in your life? Single, southern, conservative, sweet? Perhaps we need to set them up?

Hahahaha, this past weekend was my big brother's birthday. Every year, I make him the same cake. White cake with lemon curd filling and white mountain frosting. And every year, I tell him what a pain in the patootie it is to make this thing. And every year, I take that first bite of cake and remember, all over again, that it is completely worth the effort to make this masterpiece of a cake!!! Tender, fluffy white cake . . . tangy, tart lemon filling . . . light, melt-in-your-mouth frosting . . . what more could a boy want?!

Here's a cute pic of big bro with his sweet Australian Cattle Dog - Scout! She is the only lady in his life at the moment . . .


Big Brother's Birthday Cake

Cake
2 cups cake flour
1 tablespoon baking powder
1/2 teaspoon salt
2 tablespoons unsalted butter
1 2/3 cups sugar
1 cup milk
5 egg whites

Lemon Curd
1 1/2 cups sugar
1/4 cup cornstarch
1/4 teaspoon salt
1 1/2 cup cold water
6 egg yolks (save 2 whites for the icing!)
2 teaspoons grated lemon peel
1/2 cup fresh lemon juice
3 tablespoons unsalted butter

White Mountain Frosting
1/4 cup light corn syrup
1/2 cup sugar
2 tablespoons water
2 egg whites
1 teaspoons vanilla

For the cake:
Preheat your oven to 350 degrees. Generously grease and flour two 9-inch round pans with butter and flour (seriously, don't skip the flour!).

Sift together the dry ingredients and set aside.

Beat the butter in with an electric mixer. Add the sugar and the vanilla, and continue to beat until fluffy. Gradually add the dry ingredients and the milk, alternately, starting and ending with the flour.

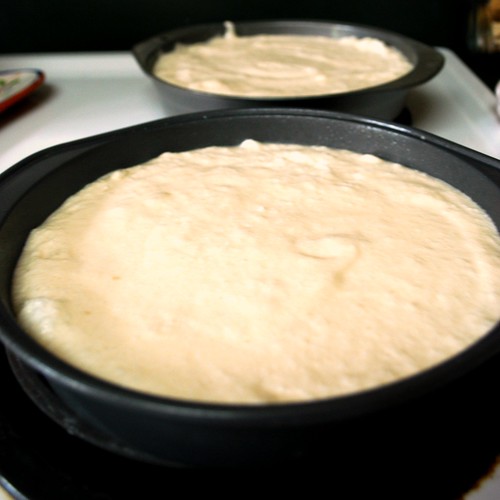
Beat the egg whites until stiff peaks form. Gently fold into the batter. Divide the batter evenly between the two prepared pans, like so . . .


Then bake for 25-30 minutes, until cake springs back when gently touched near the center.

For the lemon curd:
Combine the sugar, cornstarch, and salt in a medium saucepan. Add the water and whisk in the egg yolks, lemon peel, and lemon juice. Cook over medium heat until thick and bubbly, boiling the mixture for one minute. Remove from the heat and stir in the butter. Strain the mixture and cool to room temperature.

For the frosting:
In a small saucepan, combine the corn syrup, sugar, and water. Cover and apply medium heat until the mixture reaches a rolling boil. Do not stir, but uncover and continue to boil until the mixture reaches 242 degrees on a candy thermometer and/or the mixture spools 6-8-inch threads when drizzled from a spoon.

Meanwhile, whip the egg whites until stiff peaks form. Very gradually stream the hot sugar mixture into the egg whites, beating constantly, until thick and glossy. Add the vanilla and continue to beat until desired consistency is reached.

To assemble the cake, put half of the lemon curd over the first layer. Top with the second layer, and ice the entire outside with the frosting. Serve with the extra lemon curd on the side.

Don't you just love how shiny and gorgeous the icing is?


Sources: The cake and curd recipes come from my sister-in-law. The frosting is from my tried and true, vintage Betty Crocker cookbook.

Monday, August 3, 2009

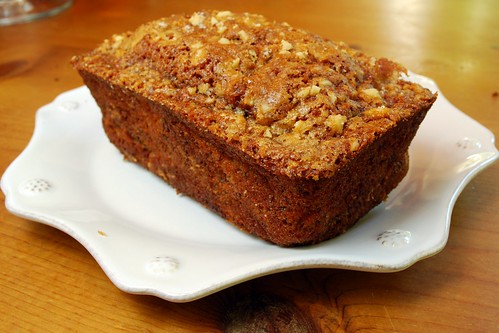
Peach Pecan Bread


We're in high season right now for peaches. We've got so many that we can barely eat them before they start to go soft! I took a batch that was just on the verge of ruin and used them to make this delectable bread.

This is a combination of 2 recipes I saw online and one that I found in an old cook book. Some recipes seemed to prefer pureed peaches in the batter, while others featured diced chunks of peaches throughout the bread. I chose not to choose - I incorporated them both for an extra peachy punch! The sugar-roasted pecans on top give the crust a great crunch, rounding out the soft, moist, juicy inside of this perfectly summery bread.


Peach & Pecan Bread

1/2 cup butter or margarine, softened
1 cup sugar
2 eggs
1/2 cup pureed peaches
1 teaspoon vanilla extract
1 2/3 cups flour
1 teaspoon baking soda
1/2 teaspoon salt
1/4 teaspoon baking powder
1/2 cup chopped pecans
1 1/2 cup peeled, diced peaches

1/4 cup chopped pecans
2 tablespoons brown sugar
1/4 teaspoon cinnamon

In a mixing bowl, cream butter and sugar. Add the eggs, one at a time, beating well after each addition. Beat in peach puree and extracts.

In a separate bowl, combine flour, baking soda, salt and baking powder; gradually add to the creamed mixture. Stir in pecans and diced peaches.

Pour into a greased 9x5-inch loaf pan. Combine remaining pecans with brown sugar and cinnamon, and sprinkle this topping over batter.

Bake at 350 degrees F for 50-55 minutes or until a toothpick inserted into the center comes out clean. Cool or 10 minutes in the pan before removing to a wire rack.

Sunday, July 5, 2009

Key Lime Pie


As many of you may remember, the hubby and I took a trip to Jekyll Island a few weeks ago. While we were there, we enjoyed some delicious key lime pie - which got me thinking - why don't I make my own key lime pie? Can I even get key limes in the grocery store here in North Georgia?

Well, the answer is yes, I can! My dear father in law picked me up a bag of key limes from the grocery store last week and delivered them into my care on the condition that I make him a pie. I was glad to accept his offer!

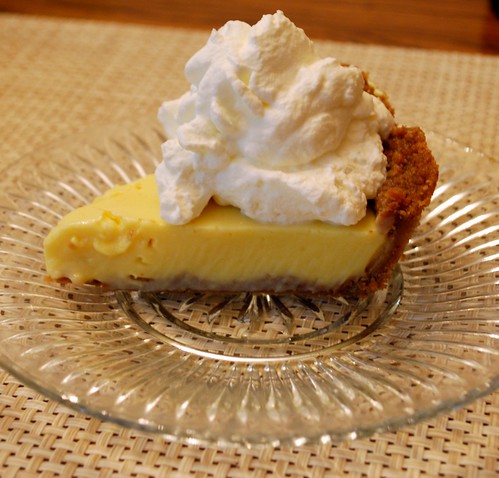
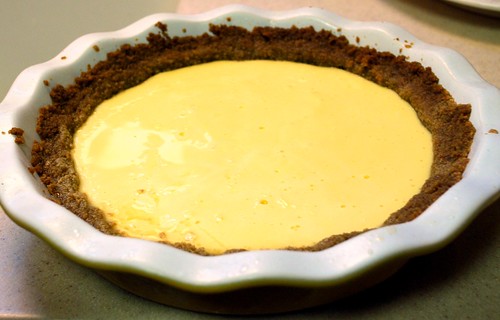
The pie turned out beautifully - tart and creamy, complimented by a perfect graham crust and a generous dollop of freshly whipped cream. Perfection!

Key Lime Pie
adapted from epicurious.com

1 1/s cups graham cracker crumbs
2 tablespoons sugar
6 tablespoons butter, melted

1 14-ounce can of sweetened condensed milk
4 large egg yolks
2/3 cup Key lime juice
1 teaspoon key lime zest
1/2 teaspoon vanilla extract

1 cup chilled heavy whipping cream, whipped until soft peaks form

Preheat your oven to 350 degrees.

Combine the graham cracker crumbs and sugar in a medium bowl. Pour over the melted butter and stir until the mixture comes together in a rough ball. Press the mixture evenly into a 9" pie dish so that it lines the bottom and sides of the dish.

In a medium bowl, whisk together the sweetened condensed milk and the egg yolks until thoroughly combined. Add the lime juice, zest, and vanilla, and continue to whisk until the mixture thickens slightly. Pour the filling into your prepared pie shell.

Bake in the middle of your oven for 15 minutes. Cool the pie completely on a rack before covering it and putting it in the refrigerator to chill for at least 8 hours.

Serve chilled, and top each piece with the freshly whipped cream.


Friday, July 3, 2009

Another Blueberry Muffin Recipe


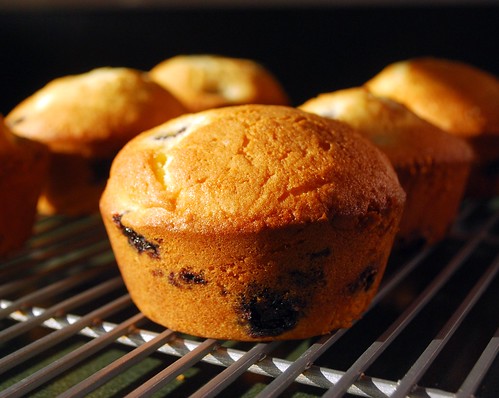
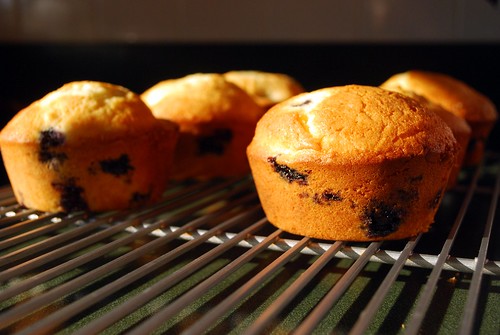
There is nothing better on a summer morning than freshly baked blueberry muffins made with perfectly ripe berries at the peak of their season. I'm taking advantage of this time of year to test out a few different muffin recipes so that I can pick out my favorite. It's so difficult with all the fun varieties out there to pick a favorite - these are tender and buttery, fluffy and moist on the inside with a nice crispy top - absolutely heavenly. But I also like my blueberry streusel muffins, too!! I think both recipes have earned a place in my muffin rotation!

Blueberry Muffins
adapted from the Secrets of Jesuit Breadmaking

1/2 cup butter-flavored shortening
3/4 cup sugar
2 eggs
2 cups all-purpose flour
1/2 teaspoon salt
2 teaspoons baking powder
2 1/2 cups fresh blueberries
1/2 cup whole milk
1 teaspoon vanilla extract

Preheat your oven to 375 degrees, and grease a 12-tin muffin pan.

Cream together the shortening and sugar until light and fluffy. Add the eggs, one at a time, blending completely.

In a separate bowl, whisk together the flour, salt, and baking powder. Measure the vanilla into the milk in a measuring cup. With your mixer on low speed, add the flour mixture and the milk mixture alternately to the batter, beginning and ending with the flour (because that's the way my momma taught me!). Mix just until blended, and then gently fold in the blueberries.

Divide the batter evenly in the muffin cups, filling them almost full. Bake for 25 minutes, until lightly golden brown. The muffins should spring back when you gently poke the tops with your fingertip. Cool in the tins for 10 minutes before removing them to a rack. Enjoy with a cup of coffee or Earl Grey tea!


Monday, June 29, 2009

My Best Banana Nut Bread


Dear readers, this past weekend was my very first farmers market selling bread on our town square. It was so much fun! The whole experience was an all-around success. I made new friends, got to know some local farmers, and even traded a few loaves for some fresh produce for next week's baked goods!

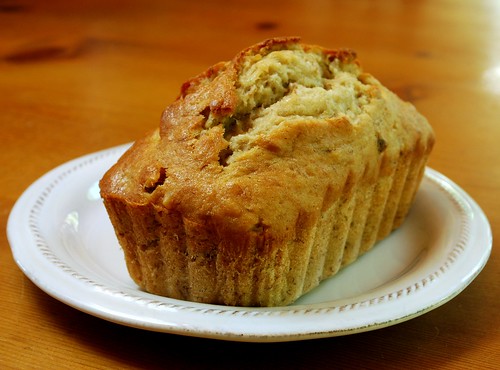
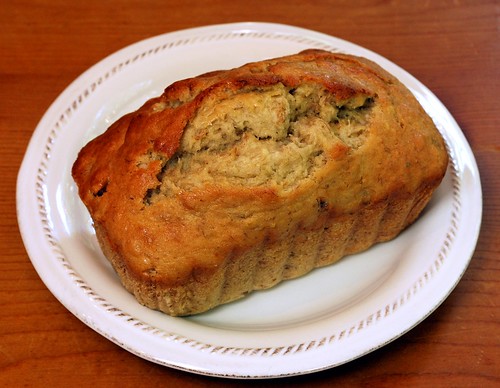
In preparing for this fun adventure, I went to some of my tried-and-true go-to recipes. Here is my very best banana nut bread. I've been making it for 10 years or so, and it's evolved with tweaks here and there. These little babies sold like hotcakes on Saturday morning!

My Best Banana Nut Bread
originally based on a recipe from Allrecipes.com

1 3/4 cups all-purpose flour
2 teaspoons baking powder
1/4 teaspoon baking soda
1/2 teaspoon salt
1/2 teaspoon cinnamon
A pinch of nutmeg
2/3 cup sugar
1/3 cup butter, softened
2 eggs
1 1/4 cup mashed banana
1 teaspoon vanilla
1/2 cup chopped walnuts (optional)

Preheat your oven to 350 degrees. Grease a loaf pan and set aside.

Sift together the flour, baking powder, soda, salt, cinnamon, nutmeg, and sugar in a large bowl. Add the butter, eggs, banana, and vanilla, mixing just until combined. Stir in the nuts, if desired.

Pour the batter into the prepared loaf pan and bake for 50-55 minutes or until a toothpick inserted into the bread comes out clean. Cool in the pan for 10 minutes before turning out onto a cooling rack. Enjoy!


Wednesday, June 24, 2009

Georgia Peach Cobbler


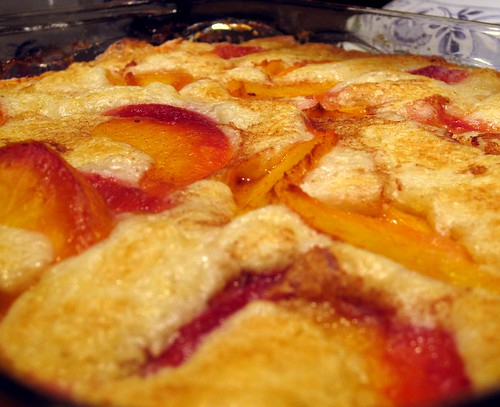
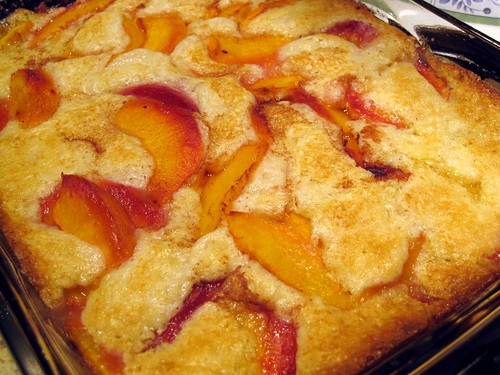
Yes, dear readers, I know I just posted a recipe for peach cobbler a mere three days ago, but are you seriously complaining?? Peach cobbler is the best!! And this one is different - you'll see . . .

So this recipe comes from our across-the-street neighbor when I was growing up - my mom's friend Mary. It used to be that people thought I was crazy when I would make this recipe, but nowadays, I think there are a few similar versions floating around the internet.

Basically, you melt a stick of butter in a pan. (This is the way any good southern recipe starts, right?!?) Then you pour your batter into the melted butter and pour your peaches over the top of the batter. The best part is that you aren't supposed to stir! How easy can this get?

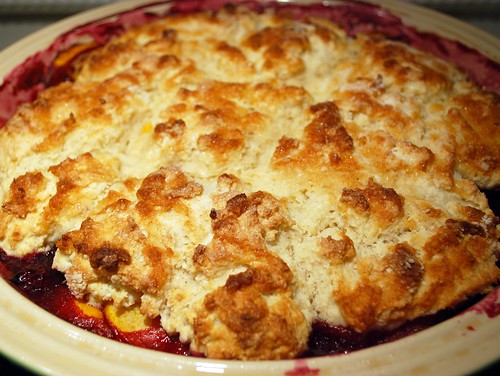
And the final product? Crispy butter-fried dough puffs up and bakes all around the juicy-sweet peach slices. Again, the hint of cinnamon (barely a whiff) really brings out the depth of that golden peach flavor.

Georgia Peach Cobbler
From my mom's friend Mary

4 cups fresh Georgia peaches, peeled and sliced
1/2 cup sugar
1/2 cup butter
3/4 cup flour
3/4 cup sugar
2 teaspoons baking powder
A dash of salt
3/4 cup milk
1/2 teaspoon cinnamon

Preheat oven to 350 degrees.

Combine the sliced peaches and the 1/2 cup sugar in a medium bowl. Cover and refrigerate for several hours, until the juices start to run.

Place the butter in a 9x13" baking dish. Put it in the oven for 3-4 minutes, until the butter is completely melted.

Meanwhile, stir together the flour, sugar, baking powder, and salt in a mixing bowl. Add the milk and stir just until combined.

Remove the dish with the butter from the oven. Pour the prepared batter over the butter. Do not stir!

Next, pour the peaches over the batter and butter. Do not stir!

Finally, sprinkle the cinnamon evenly over the top. Return the dish to the oven and bake for 45-50 minutes, until the batter sets and turns a golden brown on top. Serve hot with vanilla ice cream.

Tuesday, June 23, 2009

Blueberry Streusel Muffins


Growing up in Atlanta, we lived next door to a wonderful family - the Fullers. They had a son my older brother's age and a daughter my age. Their daughter and I were both blond little babies, and our moms would dress us in the same outfits from Laura Ashley, send us to ballet class together, and let us have sleepovers. We were flippin' adorable!

Our families were together so often, that we got to call Mrs. Fuller "Mom Fuller" - since she was our "other" mom. Even now that we are all grown up (well, mostly grown up!), our families remain close. So here is a wonderful recipe from my "other" mom - Mom Fuller's Blueberry Streusel Muffins!

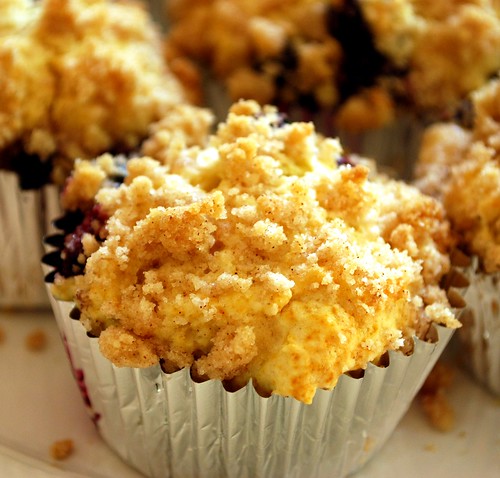
Don't you love that blueberry running down
my oh-so retro-foil muffin liner?
Try not to drool on your keyboard, kay?

Blueberry Streusel Muffins
recipe from Mom Fuller

1/3 cup sugar
1/4 cup butter, softened
1 egg
2 1/3 cups flour
4 teaspoons baking powder
1/2 teaspoon salt
1 cup milk
1 teaspoon vanilla
1 1/2 cups blueberries

1/2 cup sugar
1/3 cup flour
1/2 teaspoon cinnamon
1/4 cup butter, softened

Preheat your oven to 375 degrees, and grease or line 18 muffin cups.

In an electric mixer bowl, cream sugar and butter until light and fluffy. Add egg and beat until well-combined.

In a seperate bowl, combine flour, baking powder and salt. Add to creamed mixture alternately with milk, stirring well after each addition.

Finally, stir in vanilla and blueberries. Spoon batter into greased or lined muffin cups, filling two-thirds of the way full.

For topping, combine the sugar, flour, and teaspoon cinnamon. Cut in the butter with a fork or pastry blender until mixture resembles crumbs. Sprinkle on top of muffin batter.

Bake at 375 degrees for 25 - 30 minutes or until golden brown. Yield ~ 18 muffins.


Friday, June 19, 2009

Proud to Be a Georgia Peach!


It's no mystery around here that I am a Georgia girl, through and through. One of the best things about being in my beautiful state at this time of year is PEACHES.

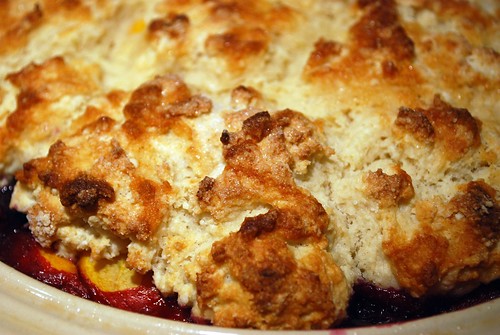
I can (and do?) eat fresh Georgia peaches morning, noon, and night when they are in season. I like them cut into juicy-tart chunks on top of my cereal in the morning, I like them sliced and peeled next to my sandwich at lunch time, I like them in my salsa with a cold drink in the afternoon, and I like them underneath a fluffy-moist, crispy-sweet biscuit crust after dinner throughout the summertime.

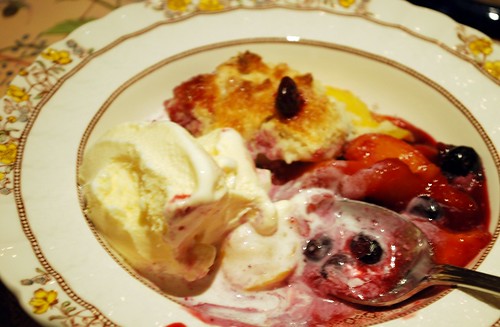
Throw in some blueberries if you must, but the peaches are the star of this dish! I made this one up on the fly - it's very versatile - you will fall head over heels for the subtle flavor that the honey lends to the fruit and to the crust!!


Align Center
Peach-and-Blueberry Cobbler

3 cups of fresh peaches, peeled and sliced
2 cups fresh blueberries
1 tablespoon honey (local is best!)
1 teaspoon lemon juice
1/3 cup sugar
A pinch of salt

2 cups flour
1/2 cup sugar
2 teaspoons baking powder
1/2 teaspoon salt
1/4 teaspoon cinnamon
4 tablespoons butter, cold
1 cup buttermilk
An extra drizzle of honey
An extra sprinkle of sugar

Preheat your oven to 375 degrees. Grease a deep pie dish or a 9x9 baking dish and set aside.

In a large bowl, combine the peaches, blueberries, honey, lemon juice, sugar, and salt. Set aside to let the juices get to flowin'!

In a medium bowl, whisk together the flour, sugar, baking powder, salt, and cinnamon. Using a pastry blender, cut in the cold butter until a flaky mixture forms. Pour in the buttermilk and stir just until a soft and supple dough forms.

Next, pour the fruit with all their yummy juices into your prepared baking dish. Then dollop the biscuit dough over the top by spoonfuls. Finally, use a spoon to drizzle some extra honey over the top of the dough. Sprinkle lightly with sugar, and pop it into the oven for about 30 minutes, until the crust is a deep golden brown and the fruit is bubbly. Serve hot with vanilla ice cream. Enjoy!

Tuesday, June 9, 2009

Granny's Blackberry Pie


For years now, I've heard stories of my husband's grandmother, who passed away shortly before he and I met. Granny is a legendary cook - I wish I could find her secret recipe book. Although most of them were probably never written down.

One of her dishes that I've been wanting to re-create is her Blackberry Pie. My husband, who raves about this concoction every time a blackberry pops into our lives, was actually not very helpful in describing the dish to me. So I went to his parents. Granny taught my mother-in-law how to make many of her signature recipes (including her biscuits, which is another story altogether). So I played 20 questions with my extremely patient and helpful mother-in-law before attempting to make Granny's Blackberry Pie.

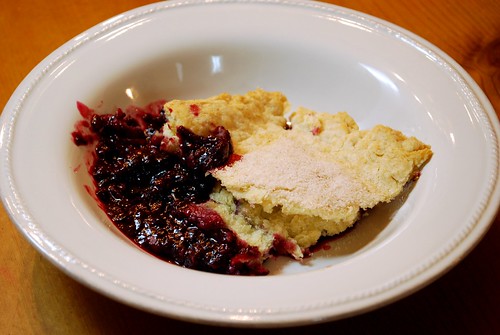
So here it is: my humble attempt to recreate a dish that my husband ate at his Granny's house when he was a little boy. I think my version doesn't have quite as much sugar as Granny's did. She would also strain the blackberries so that just the juice remained, but I kept the berries whole to add some more bulk to the filling. The crust is actually my Nanny's recipe, and I think I took some creative liberties in making the crust a bit thicker around the edges - Granny apparently just made a square and let the juices bubble up around the edges. The one thing they all remembered quite clearly, though, was the generous coating of cinnamon sugar on top - an extra little sumthin'-sumthin' that, in my humble opinion, make this dish a truly memorable one!

Granny's Blackberry Pie
from hubby's Granny

4 cups fresh blackberries
1 cup sugar
1/3 cup water
A pinch of salt

1 cup flour
1/2 teaspoon salt
1 1/2 teaspoons baking powder
6 tablespoons shortening
1 ounce (1/8 cup) ice cold water

1 egg, lightly beaten
3 tablespoons sugar
1/4 teaspoon cinnamon

Preheat your oven to 375 degrees. Grease a 9x9-inch baking dish and set aside.

In a heavy medium saucepan, combine the blackberries, sugar, water, and salt. Cook over medium heat until the mixture comes to a boil. Then reduce to a simmer, and smash up the berries using the back of a spoon or other utensil. Continue to simmer for about 30 minutes, until the mixture begins to thicken into a thin syrup. Pour the berry mixture into the prepared dish.

In a medium bowl, combine the flour, baking powder, and salt. Cut in the shortening with a pastry blender until the mixture is crumbly and flaky.


Make a well in the center and pour in the ice water. Stir lightly with a fork until a loose dough forms. Then get in there with your hands to make the dough into a ball. If the dough won't come together, then add a few more drops of cold water.

Turn out the dough onto a lightly floured surface and roll it out into a 10x10-inch square. It doesn't have to be perfect, just big enough to drape over the dish with the berries. Trim the edges, and pinch them to the edge of the dish.


Next, brush the egg over the crust. Combine the cinnamon and sugar in a small bowl and sprinkle over the top. Bake for about 25 minutes, until the crust is golden brown and the berries are nice and bubbly. Allow to cool for 10 minutes before serving.


Wednesday, June 3, 2009

Dad's Birthday Cake


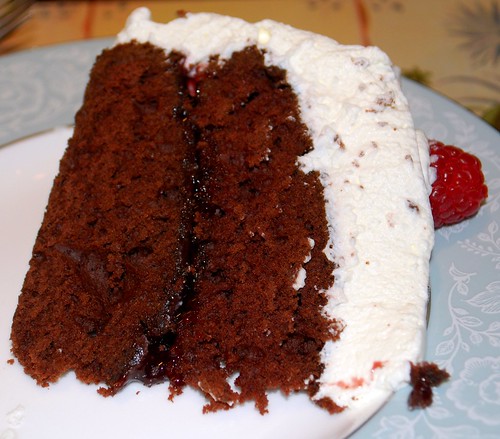
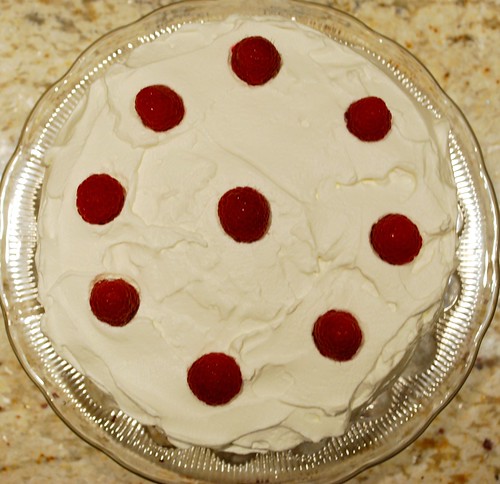
My dad loves chocolate. My dad loves whipped cream. My dad's birthday cake for years and years has been a classic chocolate cake iced with fresh, unsweetened whipped cream. This year, though, he had a brilliant idea. Why not add a raspberry filling in the middle? Brilliant!!
The whole family raved about this cake. It was such a festive birthday cake, super easy, and a really great combination of raspberry, cream, and fluffy moist chocolate cake!


Raspberries 'n' Cream Chocolate Cake
based on my favorite Betty Crocker's Cookbook Chocolate Cake recipe

2 1/4 cups flour
1 2/3 cups sugar
2/3 cup cocoa
1 1/4 teaspoons baking soda
1 teaspoon salt
1/4 teaspoon baking powder
1 1/4 cups water
1/4 cup shortening
2 eggs
1 teaspoon vanilla
1/4 cup seedless raspberry preserves
3 cups whipping cream
8-10 fresh raspberries

Heat oven to 350 degrees and grease 2 round 9" cake pans.

Measure all ingredients into large mixer bowl. Blend 1/2 minute on low speed, scraping bowl constantly. Beat 3 minutes high speed, scraping bowl occasionally. Pour batter into cupcake tins until 2/3 full. Bake for 23-35 minutes. Cool on racks.

Whip the cream until it reaches a good spreading consistency. Spread the raspberry preserves over the top of the first layer of cake. Gently place the next layer on top. Ice the outside of the cake with the plain whipped cream. Decorate the top of the cake with the fresh berries, and serve immediately. Enjoy!


Sunday, May 31, 2009

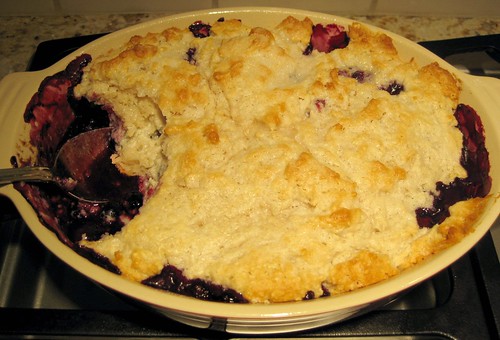
Blueberry Cobbler


Southern girls know how to whip up a cobbler without looking at a cookbook. One of my favorite things to do during the summer months is to eat fresh berries, peaches, and fruit baked in a cobbler after dinner. Um, and for breakfast on top of my oatmeal, too . . .

Here is a basic recipe for blueberry cobbler. The tiny touch of cinnamon really makes it special.


Blueberry Cobbler


3 pints blueberries, washed
1/3 cup flour
1/3 cup sugar
1 tablespoon lemon juice

2 cups flour
1/2 cup sugar
1/4 teaspoon cinnamon
2 teaspoons baking powder
2/3 cup shortening
1/2-2/3 cup half and half or milk
2 tablespoons sugar for sprinkling

Vanilla Ice Cream of Whipped Cream


Preheat your oven to 375 degrees. Grease a 9x9" (or similar sized) baking dish and set aside.

Combine the berries with the flour, sugar, and lemon juice. Set aside.

In a medium bowl, whisk together flour, sugar, cinnamon, and baking powder. Using a pastry blender, cut the shortening into the flour until the mixture is flaky. Create a well in the middle, and add the milk. Mix together with a fork just until a soft dough forms.

Pour the berry mixture into the prepared baking dish. Then drop the dough by spoonfuls over the top. Sprinkle the crust with the remaining 2 tablespoons of sugar.

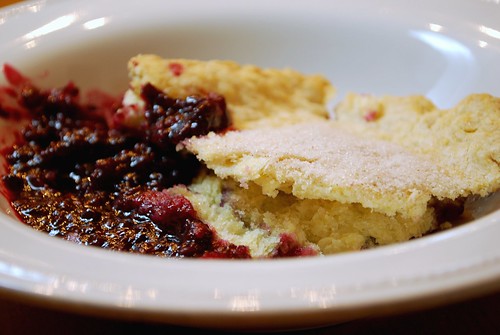
Bake for about 25 minutes, until the crust is golden brown and the berries are bubbly. Serve warm with ice cream or whipped cream.
Monday, May 11, 2009

Creamy-Tangy Fruit Dip


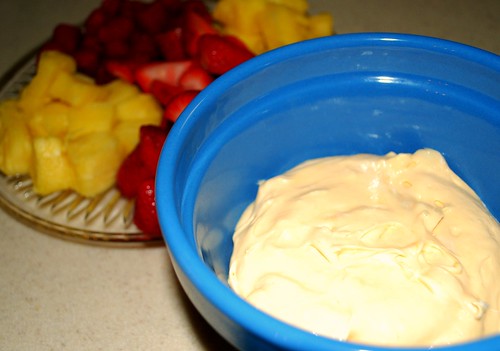
This fruit dip is absolutely addictive. My sister-in-law makes it for us on occasion, and it works great as either an appetizer, dessert, or summer afternoon snack. I was so excited that she agreed to let me blog it when she made it for Mother's Day this weekend! There was a good bit of impatience and teasing aimed in my general direction as I snapped these photos - the whole family loves this stuff - but I think you will agree, dear readers, that it was worth it.

You will not believe how tasty this dip is. Plus, you know me, friends, and you KNOW how I love an *unexpected ingredient* - check out what makes this recipe so special! Good ol' fashioned Tang!

Creamy-Tangy Fruit Dip

1 8-ounce package of cream cheese, softened
1 7-ounce jar of marshmallow cream
1 1/2 teaspoons Tang orange drink mix
Strawberries, raspberries, pineapple, whatever assortment of fruit you like

Blend the cream cheese, the marshmallow cream, and the tang until completely combined. Serve with fresh fruit and toothpicks!


Made by Lena