Showing posts with label Cookies. Show all posts
Thursday, July 9, 2009
Cookies Transcend Politics
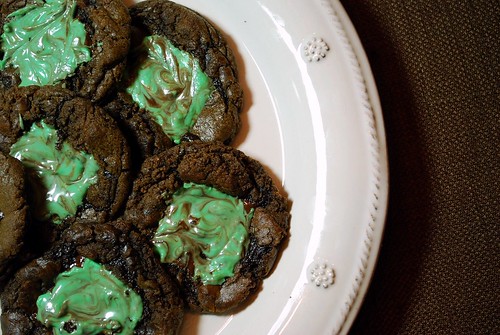
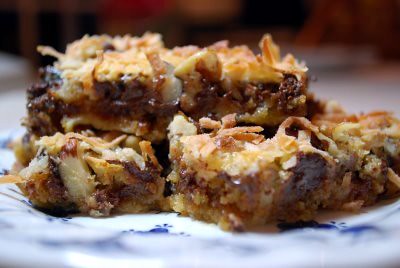
A good meal is good no matter which side of the aisle you eat it on. Yet another example of how food brings us all together!
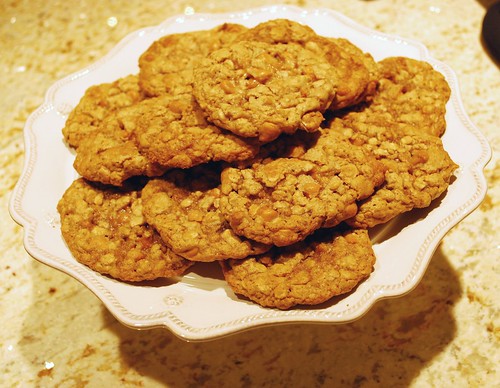
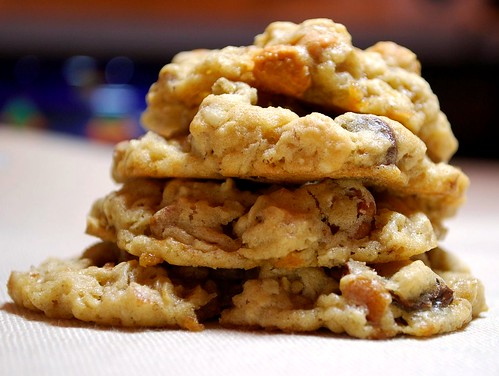
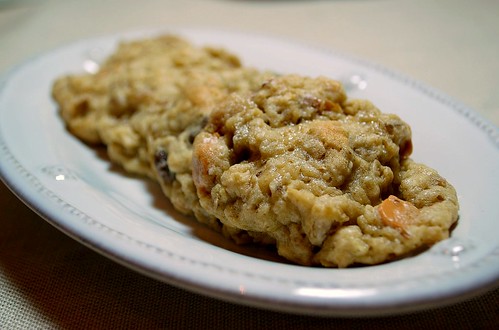
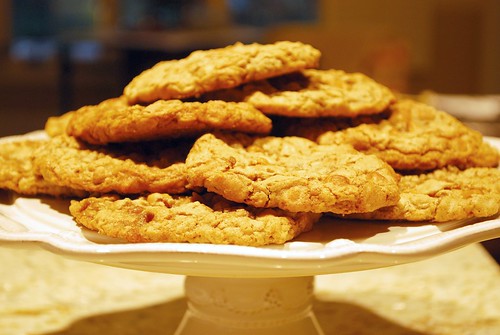
I made these wonderful cookies for a political-themed election night dinner this past fall. (Don't worry! There were dishes that were blue-state-oriented, too!) Since then, this has become a go-to recipe for me when I'm craving a super-chewy and delicious oatmeal butterscotch cookie! I've made a few small tweaks to the original, but Cindy McCain definitely knew what she was doing when she whipped these cookies up!
Chewy Oatmeal Butterscotch Cookies
adapted from Cindy McCain via Family Circle Magazine
3/4 cup unsalted butter
3/4 cup sugar
3/4 cup light brown sugar, packed
2 large eggs
1 1/2 teaspoons vanilla extract
1 1/4 cups flour
1 teaspoon baking soda
3/4 teaspoon cinnamon
1/2 teaspoon salt
3 cups rolled oats (not quick-cooking - just regular)
1 12-ounce package of butterscotch morsels
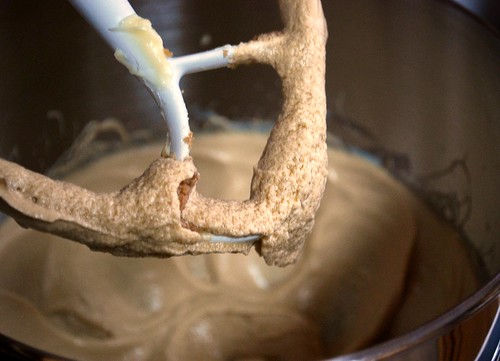
Preheat your oven to 375 degrees. Beat the butter and sugars together until light and fluffy. Next, add the eggs, one at a time, beating after each addition so that they are completely incorporated. Beat in the vanilla.
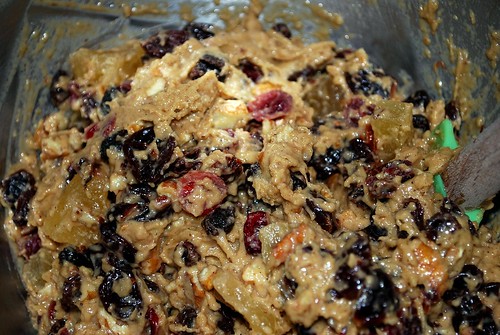
In a separate bowl, combine the flour, baking soda, cinnamon, salt, and rolled oats. Gradually add the dry ingredient mixture into the creamed mixture. Then fold in the butterscotch morsels into the cookie dough.
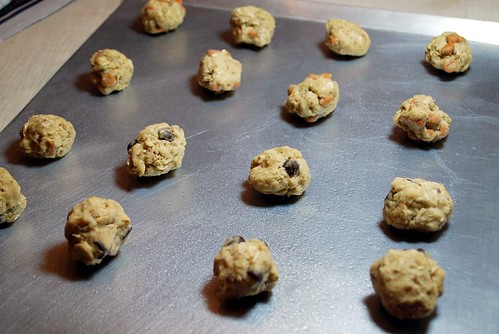
Drop by heaping tablespoonfuls onto a greased cookie sheet, leaving about 2 inches of space between the cookies because they will spread. Bake for about 8 minutes, or until the edges are lightly golden brown. Allow the cookies to cool on the sheet for 5 minutes before removing to cooling racks. Enjoy!
Monday, April 20, 2009
Old-Fashioned Oatmeal Raisin Cookies
This cookie has a delicate crumb, a cakey texture, and a subtle spice. Warm out of the oven is the best way to eat them. They are also amazing with chocolate chips in place of the raisins. I have grown up eating these delicious scone-like treats. This comforting, old-fashioned cookie goes perfectly with a tall glass of cold milk!
DoDo's Oatmeal Cookies
from my mom's friend Kay's grandmother Dodo
1 cup butter
1 cup sugar
2 eggs
2 cups oatmeal
2 cups chopped raisins
2 cups flour
1 teaspoon baking soda
1 teaspoon cinnamon
1 cup chopped walnuts (optional)
8 tablespoons buttermilk
Preheat your oven to 350 degrees. Cream butter, sugar, and eggs in a large mixing bowl. Add the oatmeal. Sift flour, soda, and cinnamon together in a medium bowl. Alternate adding the dry ingredients and the buttermilk to the creamed mixture. Then gently stir in the raisins and the nuts - do not overmix. Drop on greased cookie sheet. Bake for 12-14 minutes.
Thursday, March 19, 2009
Chocolate Mint Paddies
These are the perfect chocolate cookies, made only better by the molten chocolate mint candies that nest in the center of them. I am so glad that a friend recommended this recipe to me. You can tell just by reading it that it is a true retro recipe!
These chocolate cookies are chewy, with just a slight crunch around the edge. The texture is perfectly satisfying - chewy and gooey - and the mint centers melt in your mouth to make the perfectly decadent dessert after a weeknight meal. Their colorful swirls were a match made in heaven for our St. Patrick's Day feast this week.
Chocolate Mint Paddies
Adapted from AllRecipes.com
3/4 cup butter
1/2 cup brown sugar
1 cup sugar
2 tablespoons molasses
2 tablespoons water
2 cups semisweet chocolate chips
1 teaspoon vanilla
2 eggs
2 1/2 cups flour
1 1/4 teaspoons baking soda
1/2 teaspoon salt
36 chocolate covered mint candies (i.e. Andes Mints)
In a heavy saucepan, heat the butter, the sugars, the molasses, and the water until melted and completely combined. Remove from the heat, and pour in the chocolate chips, stirring until melted and incorporated. Set the mixture aside to cool for about 15 minutes.
Next, beat in the eggs, one at a time with the vanilla. In a seperate bowl, whisk together the dry ingredients. Gradually add the dry ingredients to the chocolate mixture, stirring until completely incorporated. Cover and chill the dough for at least one hour.
Preheat your oven to 350 degrees and grease 2 large cookie sheets. Roll the chilled dough into walnut-sized balls, and place them about 2 inches apart on the prepared cookie sheets.
Bake the cookies for about 8-10 minutes. Remove from the oven and press a chocolate-covered mint candy into the center of each cookie. Allow the candies to melt for about 1 minute. Then, using a toothpick, swirl the mint portion of the candy in a decorative fashion. Remove the cookies to racks to cool completely. Yield 3-4 dozen cookies. Enjoy!
Tuesday, March 3, 2009
Chew on This
I think I need to start out by admitting the truth: I love Alton Brown. I have even considered going to stalk him in the finer grocery stores of north Atlanta. I've always been a bit of a science nerd, so his scientific approach to cooking and baking really appeals to me. I've been wanting to try his recipe for chewy chocolate chip cookies, and over the weekend, I got my chance! They turned out beautifully - fluffy, doughy, chewy, delicious.
The only change I've made to his original recipe is to decrease slightly the amount of chocolate chips - when it comes to cookies I like to highlight the flavor of the dough so that it isn't overpowered by the chocolate.
The Chewy
from Alton Brown
1 cup unsalted butter, melted
1 1/4 cups packed brown sugar
1/4 cup sugar
1 egg
1 egg yolk
2 tablespoons milk
1 teaspoon vanilla
2 1/4 cups bread flour
1 teaspoon baking soda
1 teaspoon kosher salt
1 1/2 cups chocolate chips
In a large electric mixer bowl, measure the butter and the sugars. Blend until light and fluffy. Add milk, egg, egg yolk, and vanilla. Blend together again until completely combined.
In a separate bowl, combine the dry ingredients (flour, baking soda, and salt). With the mixer on low speed, gradually add the dry ingredients to the egg and butter mixture until a soft dough forms. Fold in the chocolate chips. Cover the dough and chill for at least 1 hour.
Preheat the oven to 375 degrees. Line a cookie sheet with parchment paper, and spray the paper with cooking spray. Using a 1/3 cup scoop, drop balls of dough onto the greased parchment paper, allowing about 3-4 inches in between the cookies because they will spread while baking. Bake for 13-15 minutes. I like to cool them on a plate instead of a cooling rack so that they stay extra moist, but it's up to you. Enjoy!
Monday, February 16, 2009
On Eagle's Wings
Made dessert for tonight with some goodies I had in the pantry . . . It had been years since I made the Magic Cookie Bars whose recipe is found on the back of the Eagle Brand Sweetened Condensed Milk can. I used 3 different kinds of nuts in these in order to really highlight the wonderful flavor of these classic treats!
Triple-Nut Magic Bars
from Eagle Brand Recipes
1 1/2 cups graham cracker crumbs
1/2 cup butter, melted
1 14-ounce can sweetened condensed milk (recommended: Eagle's)
1 1/2 cups semi-sweet chocolate chips
1/2 cup almonds, chopped
1/2 cup hazelnuts, chopped
1/2 cup walnuts, chopped
1 cup coconut flake
Preheat your oven to 350 degrees. Apply cooking spray to a 9"x13" pan and set aside.
In a small mixing bowl, combine graham cracker crumbs and melted butter. Press the mixture into the bottom of the prepared pan to form a crust. Pour condensed milk evenly across the crust. Layer remaining ingredients over the condensed milk.
Bake for 25-30 minutes, or until topping is golden brown. Cool and slice into 1"x3" bars. Enjoy!
Labels:
Brownies 'n' Bars,
Chocolate,
Cookies,
Desserts,
Nice-n-Easy
Wednesday, February 11, 2009
Raspberry Shortbread Hearts
These are a special treat I made for my valentine this year. Tender, buttery shortbread hearts sandwiched with red raspberry preserves. Delish!
So, let me tell you everything I know about shortbread. First and foremost, it's a simple cookie with not very many ingredients. In order to get the best flavor, you have to use high-quality ingredients, especially when it comes to the butter - I used Kerrygold Irish Butter in this particular batch. Land 'o' Lakes is alright, but if you can splurge on some organic or Irish butter, then you will not regret it. It would be a mortal sin to try to use a butter substitute or even margarine, so just don't go there.
Second, shortbread is extremely versatile. We love to make it at Christmas time with all of our favorite cookie cutters. Then we decorate them with festive colored sprinkles. But you can also flavor these cookies by adding any number of things: finely ground nuts, zest from oranges or lemons, chocolate chips, or instant coffee powder. Here, I've made sandwich cookies with seedless red raspberry preserves, but you could use any sort of fruit filling you desire, or use a cream filling or your favorite icing. The possibilities are endless.
Why do they call it short, you ask? Well, the answer is twofold. First, the "short" in shortbread refers to the "shortening" (or in this case, butter) that is used to produce a crumbly texture. Second, a crumbly texture is actually called a "short" texture. Think about it - shortcake has a crumbly texture, too!
And the final, and most important, thing that I can tell you about shortbread is that it is the absolute BEST treat that you can have with your afternoon tea. One of my greatest joys in life is a cup of Earl Grey tea with a nice shortbread cookie to dip into it. Heaven!
Scottish Shortbread
1 cup butter, completely softened1/4 cup sugar
2 cups flour
Seedless red raspberry preserves (for making raspberry hearts)
Preheat oven to 375 degrees. In a large electric mixer bowl, cream butter and sugar until light and fluffy. This step is particularly important since shortbread cookies have no leavening agent (i.e. no baking soda or baking powder), so the tiny air bubbles you're beating in now are the only source of fluffiness in your cookies. Add the flour, and continue mixing until a stiff dough forms. If your mixture is too crumbly, add a tablespoon of butter, softened, until a nice pliable dough forms.
On a lightly floured surface, roll out the dough to about a 1/4" thickness. Cut the dough into desired shapes.

For these cookies, I cut all of the dough into hearts. Then I took half of those hearts and cut a smaller heart out of the center of each of them. That way, I had an equal number of solid-bottoms and window-tops to make my sandwiches! And I baked the smaller hearts, too, and made mini-sandwiches out of them.

Place your cookies on ungreased baking sheets, about 1/2" apart. Shortbread cookies don't spread like some cookies do, so they hold their shape well and you don't have to worry too much if they are close together on the cookie sheet!
Bake for 15-20 minutes, or until cookies are "set" and starting to puff slightly. They do not need to be brown - just a very light golden color is good. Cool for 5 minutes on baking sheets, then remove to racks to cool completely.

Once your cookies have completely cooled, it's time to assemble them! Place a large solid heart on a plate, spread about a tablespoon of your raspberry preserves around the center of the cookie. Gently place your window cookie on top and press down lightly. Voila!
And here is a photo of a few of the mini-heart sandwiches I made as well. I love how the jam is dripping out the edges! Are you drooling yet???
Tuesday, February 10, 2009
Dad's Famous Chocolate Chip Cookies

So here it is: my dad's legendary recipe for the absolute best chocolate chip cookies you've ever had. He only makes them about once a year, so everyone gets super-excited when dad pulls out the ol' Kitchen Aid mixer!! They were always the ultimate care package that I'd get form my parents when I was away at college.
The recipe originates with my great grandmother (my dad's mom's mom) who discovered and wrote out this recipe. The funny part is, she basically took a regular chocolate chip cookie recipe and added a bunch of extra flour to it. So when she wrote it out, it was X amount of flour "plus 26 tablespoons of flour"!!!
We've re-worked the calculations to make the measuring process less labor-intensive, but the recipe is still the same. The extra flour in this recipe gives the cookies much more body and texture, much less spread and greasiness. It really highlights the wonderful flavor of the dough, without allowing the chips and butter to run the show. Also, it gives these cookies a wonderful texture - they come out of the oven lightly crispy on the outside, and soft and doughy on the inside. They are almost like a really moist cookie crossed with a scone. Try them, and you will be hooked for LIFE!

Dad's Chocolate Chip Cookies
3 7/8 cups flour (4 cups minus 2 tablespoons)
1 teaspoon baking soda
1 teaspoon salt
1 cup butter or margarine, softened
3/4 cup sugar
3/4 cup light brown sugar, packed
1 teaspoon vanilla extract
2 large eggs
1 1/2 cups semi-sweet chocolate chips
1 cup chopped pecans, optional
Preheat your oven to 375 degrees. In a medium bowl, combine flour, baking soda, and salt - set aside. In a large electric mixing bowl, cream butter, sugars, and vanilla. Add the eggs, beating well until incorporated. With the mixer on low speed, gradually add the flour mixture - blending until a very stiff dough forms. Using a wooden spoon, stir in your chocolate chips and nuts until evenly distributed. Drop by heaping tablespoonfuls onto ungreased cookie sheets. Bake for 7-10 minutes, or until lightly golden brown on top. Cool on racks.
Sunday, February 8, 2009
Valentine Sweets
Whenever I have some egg whites on hand, I love to make some meringues. They are such a light and tasty cookie that you can enjoy guilt-free since they are very low in fat! The delicate texture and lightly sweet flavor is perfect for a little treat. They melt in your mouth so perfectly - yum!
Here are a few of my tips on making the perfect meringues:
Make sure your bowl and beater are clean and grease-free.
Make them on a day with low humidity (no rain).
Allow your egg whites to come to room temperature before beating them.
Superfine sugar helps keep the meringues light and fluffy, but regular sugar works too.
Almond Meringues
1/2 cup finely chopped almonds
4 egg whites
Using a pastry bag with a decorative tip, or just a zip lock bag with the corner snipped off, pipe the mixture into decorative shapes on top of the almonds. I made hearts and kisses for Valentine's day, but you can also make other shapes. You can pipe baskets to be filled with mousse, ice cream, or other fillings. The possibilities are endless!
Bake for 1-3 hours, or until meringues are dried and firm. Cool on racks. Store in a tightly sealed container for up to a week, or freeze these little treats until you need them.
Here are a few of my tips on making the perfect meringues:
Make sure your bowl and beater are clean and grease-free.
Make them on a day with low humidity (no rain).
Allow your egg whites to come to room temperature before beating them.
Superfine sugar helps keep the meringues light and fluffy, but regular sugar works too.
4 egg whites
1/8 teaspoon cream of tartar
1/8 teaspoon salt3/4 cup sugar
1/4 teaspoon vanilla extract1/2 teaspoon almond extract
2-3 drops food coloring, if desiredPreheat your oven to 200 degress. Line baking sheets with parchment paper and spray with cooking spray. Sprinkle almonds on the parchment paper, spreading evenly. Set aside.
In a large electric mixer bowl, combine egg whites with cream of tartar and salt. Beat on high until soft peaks form.
Next, while continuing to beat the mixture, gradually add the sugar, one tablespoon at a time. Mixture should become glossy and thick, forming stiff peaks. Add the vanilla and almond extracts and the food coloring, if desired.Using a pastry bag with a decorative tip, or just a zip lock bag with the corner snipped off, pipe the mixture into decorative shapes on top of the almonds. I made hearts and kisses for Valentine's day, but you can also make other shapes. You can pipe baskets to be filled with mousse, ice cream, or other fillings. The possibilities are endless!
Bake for 1-3 hours, or until meringues are dried and firm. Cool on racks. Store in a tightly sealed container for up to a week, or freeze these little treats until you need them.
Labels:
Cookies,
Desserts,
Eggs,
Make-Ahead
Monday, February 2, 2009
The Joining of Two of My Passions . . .
As most of you know, dear readers, I live in Georgia. I'm not sure if you've heard, but there's a little bit of a craze down here over a game called football. I grew up with two brothers, so it was pretty much a foregone conclusion that I would be a sports fan. I have a special place in my heart for one team in particular.
So on occasion I like to bring two of the great passions in my life together - football and baking - and make football cookies. So I wanted to share with my readers a collection of tips on how to make great football cookies for your next tailgate or Superbowl party.
First of all, here is my recipe for super-simple icing for decorating cookies:
Super-Simple Cookie-Decorating Icing
1 cup icing sugar
1 tablespoon milk
1 drop vanilla
Blend ingredients in a small bowl with a fork. If icing is too thick, add a drop of milk until it reaches the desired consistency. If it is too thin, add extra icing sugar. A drop of food coloring may be added to create any color you wish!
Spoon the icing into a ziplock bag. Close the bag securely. Using a sharp pair of scissors, snip of a very small bottom corner of the bag. Pipe the icing through the corner onto the cookies. Allow the icing to set before stacking your cookies.
Second, let's talk about what cookie equipment you will need. If you don't have a football cookie cutter, then DON'T WORRY! We can't all be as lucky as me and have a set of 101 cookie cutters. In fact, I accidentally left mine behind when I went to my parents' house to make these this year, and they ended up turning out perfectly even though I just used a sharp knife to cut out the shapes.
And thirdly, let's talk cookie recipes. In the past, I've made football cookies just by using my football cookie cutter with my regular sugar cookie recipe. Then I iced them with chocolate frosting and drew on the laces with some plain white icing. But that was sort of a lot of different flavors, and I'm not a huge fan of chocolate icing on sugar cookies, so the search continued.
Recently, I discovered this wonderful recipe for Brownie Roll-Out Cookies from Smitten Kitchen's blog. I knew immediately I'd found a new recipe for my football cookies! No need for chocolate icing, just draw on the laces like so . . .
They turned out GREAT and were a big hit at our little Superbowl gathering.
Next year, I think I'll try making gingerbread football cookies - they are the perfect pigskin color!
Sunday, January 25, 2009
In Mourning for Cottage Living . . .
So I'm in mourning this month for Cottage Living, which has been discontinued. I have loved that magazine from the very first issue. Sadly, the November/December 2008 issue was the last one. So in honor of Cottage Living, I want to share a recipe from the very first issue with you, dear readers. It has become a staple in my kitchen, and I hope you enjoy it.
Oatmeal Chocolate Chip Cookies
Adapted from the premiere issue of Cottage Living
1 cup butter, softened
1 cup light brown sugar
1/2 cup sugar
2 large eggs
2 teaspoons vanilla
2 cups flour
1 teaspoon baking soda
1/2 teaspoon salt
3 cups uncooked regular oats
1 cup semisweet chocolate chips and/or butterscotch chips
1 cup toasted pecans, chopped (optional)
Preheat oven to 350°. Grease a baking sheet and set aside. In an electric mixer bowl, beat butter and both sugars until creamy. Add eggs and vanilla, beating well.
In a separate bowl, combine flour, baking soda, and salt. Add the oats and stir well. Gradually add to the butter mixture, mixing until well blended. With a wooden spoon, stir in the chocolate chips and pecans.
Drop by rounded tablespoons 2 inches apart onto prepared baking sheets. Bake for 8-10 minutes or until golden brown around the edges. Cool on pan 2 to 3 minutes before cooling on wire racks.
Yum. Can someone please help me stop eating these????
Monday, January 19, 2009
Brownie Roll-Out Cookies
For every season of the TV show 24, my parents have invited all of the kids plus a few of their friends over every Monday evening for a viewing party. We all eat dinner together. Then, when the show starts, all the boys (plus me) go downstairs to watch 24 while all the ladies stay upstairs and drink tea and talk.
A few years ago when my wonderful husband got me my set of 101 cookie cutters, I came up with the idea to make 24 cookies - cut-outs of "2" and "4" stuck together. For this year's season of 24, I wanted to try a new and different roll-out cookie recipe. I've done shortbread, sugar, and lemon cut-outs in seasons past, but was in search of something chocolate.
I was so excited when I found this old family recipe from the writer of Smitten Kitchen. The only thing I have changed in the recipe is adding a tiny bit more cocoa powder - to ensure an extra chocolaty treat! They turned out so great - everyone at the party raved about how moist, chewy, and tender they were - nice and thick like a fudgy brownie. Definitely a keeper!
Brownie Roll-Out Cookies
Recipe from Smitten Kitchen
3 cups all-purpose flour
1/2 teaspoon salt
1/2 teaspoon baking powder
1/2 cup salted butter, softened
1/2 cup unsalted butter, softened
1 1/2 cups sugar
2 large eggs
1 teaspoon vanilla extract
3/4 cup unsweetened cocoa
In a medium bowl, mix together flour, salt and baking powder and set aside.
In an electric mixer bowl, blend butter, sugar, eggs, vanilla and cocoa. Gradually add the dry ingredients, mix at medium speed until dough is smooth. Wrap the dough in plastic and chill for at least an hour.
Preheat oven at 350 degrees. Roll out the dough on a lightly floured surface until it is approximately 1/4 inch thick. Cut into desired shapes.
Bake on a parchment-lined baking sheet for 8 to 11 minutes until the edges are firm and the centers are slightly soft and puffed.
Transfer to a wire rack to cool.
Enjoy with a tall glass of cold milk and a hot dose of Jack Bauer!!!
Tuesday, December 30, 2008
Oreo Truffles with a Peppermint Twist
So I've been hearing so much buzz about how amazing oreo truffles are - I thought I'd try them, but with a peppermint twist. Instead of using Oreos, I used Trader Joe's Candy Cane Joe-Joe cookies. They are basically just like oreos, with a peppermint-cream filling.
Oreo Truffles with a Peppermint Twist
Adapted from Beantown Baker's recipe
24 peppermint oreo cookies
1/2 cup (4 oz.) sweetened condensed milk
1 teaspoon vanilla extract
1/4 teaspoon peppermint extract
8 ounces bittersweet chocolate
1 teaspoon canola oil
3 peppermint candy canes, crushed into small pieces
Line a cookie sheet with aluminum foil or wax paper and clear some space in your fridge.
Crush cookies using a food processor or a blender. The cookies should be crumbly, but not totally pulverized.
In a measuring cup, combine condensed milk, vanilla, and peppermint extract, stirring until incorporated. Pour this mixture over the crushed Oreos, and stir until ingredients come together. Working quickly, form the mixture into 1" balls by rolling between your hands, and place them on cookie sheet. Even if the mimxture feels sticky at first, it will roll into balls well if you use your palms. Put the balls into refrigerator to chill (for easy dipping).
Sidenote: at this point in the process, my cute hubby says, "I don't know WHAT to caal THOSE balls . . ." - in reference to his funny name for Hayley's Nutella Cookies that I make.
Melt the chocolate using your favorite method. I like to use my double boiler, but you can use your microwave in 10-15 second increments as well.
Dip chocolate balls into melted chocolate and put back on cookie sheet.
Sprinkle with crushed peppermint, and return to fridge until chocolate hardens.
Then I placed ours in mini-cupcake liners for no-mess scarfing.
We took a tin of these with us on our trip to the mountains for New Year's Eve and they were a BIG hit! There were only 4 of us, and we polished this batch off with ease. Oops! Guess it's time for New Year's Resolutions . . .
Labels:
Candy,
Chocolate,
Christmas and Holidays,
Cookies,
Desserts
Fruitcake - Cookies?
I really don't like fruitcake. At all.
I know, I know, this is very "un-vintage" of me.
Maybe it's the creepy little mystery bits of neon-colored candies. Or maybe it's the dense and soggy texture. Or the weird not-quite-recognizable flavors.
However, I am married to a man who loves fruitcake. So in a valiant attempt to do something sweet for my dear hubby, I decided to transform fruitcake this holiday season into something better, something yummy, or at least something not quite so creepy and mysterious.
It started with a cookie recipe I found in my parents' old Woman's Day Collector's Cookbook pages. But even tweaked that recipe a little bit to make these delicious, tender little cookies.
Instead of fluorescent-colored candies, I decided to go with some tasty dried fruits. Instead of bread that is soggy with liquor, I reconstituted the fruits with bourbon. Instead of a brick of dense cake, this recipe turned out light and fluffy.
All in all, it was a success . . . Much better than your average fruitcake! They almost turned out like tiny fluffy fruitcake muffin-tops. Excellent as an afternoon snack or for breakfast with some coffee!
Fruitcake Cookies
Inspired by Woman's Day Collector's Cookbook
1 cup raisins
1 cup dried cranberries
1/4 cup bourbon
1 cup dried cherries
1/2 cup dried pineapple
1/4 cup rum
1 1/2 cups flour
1 1/2 teaspoons baking soda
1 1/2 teaspoons cinnamon
1/2 teaspoon nutmeg
1/2 teaspoon cloves
1/4 cup butter or margarine, softened
1/2 cup light brown sugar, packed
2 eggs
3/4 cup pecans, roughly chopped
3/4 cup almonds, roughly chopped
In a medium bowl, combine raisins, cranberries, and bourbon. In a second bowl, combine dried cherries, dried pineapple, and rum. Allow both bowls to stand for 1 hour.
Meanwhile, whisk together flour, soda, cinnamon, nutmeg, and cloves. In a mixing bowl, cream butter and sugar. Add eggs and beat until light and fluffy.
With mixer on low speed, add flour gradually and mix until smooth.
Add the fruit mixtures and nuts and mix well. Cover and chill overnight.
Preheat oven to 325 degrees. Shape dough in balls the size of walnuts, and put on greased cookie sheets.
Bake for about 12 minutes. Cool on racks. Makes about 4 dozen.
Tuesday, December 23, 2008
Betty Crocker's Gingerbread Boys

This post also brings up a fun story about my Betty Crocker cookbook.

One of the first times I went over to my hubby's house, I saw the exact same bright orange cookbook on his bookshelf! It was then, at that very moment, that I knew he was the one. . .
So back to the cookies! I thought this was an interesting recipe because it uses shortening instead of butter, and it uses no eggs. I tweaked the spices to my tastes and here is what I came up with!
Gingerbread Cookies
Adapted from Betty Crocker's Cookbook (1976)
1/2 cup shortening (ex. Crisco)
1/2 cup sugar
1/2 cup dark molasses
1/4 cup water
2 1/2 cups all-purpose flour
3/4 teaspoon salt
1/2 teaspoon baking soda
2 teaspoons ginger
1/4 teaspoon nutmeg
1/2 teaspoon cinnamon
Cream butter and sugar. Blend in molasses, water, flour, salt, baking soda, ginger, nutmeg and allspice. Cover; chill 2 to 3 hours.
Heat oven to 375F. Roll dough 1/4 inch thick on lightly floured surface. Cut with cookie cutter; place on ungreased baking sheet.
Decorate with raisins, red hots, or other candies (make sure you pick candies that won't melt!).


Comparison to my regular recipe for gingies:
I was amazed at how different these cookies turned out than my usual recipe. I served these at a Christmas caroling party over the weekend, and people could not stop eating these. They are slightly crispier and chewier than my other recipe, which is usually more cake-like and fluffy. These tasted like the freshest ginger snaps you've ever had. I'm pretty much sold on them as my new yearly recipe! I wish I had a picture to show, but we sort of decorated these AT the party, and they were eaten up too fast for me to have a photo session. We are making another batch for Christmas Eve, so hopefully I'll snap a few photos then!
Labels:
Christmas and Holidays,
Cookies,
Desserts
Subscribe to:
Posts (Atom)