Thursday, April 30, 2009

Vidalia Victuals Contest


I'm so pleased, dear readers, to announce this interactive Vintage Victuals blog event.

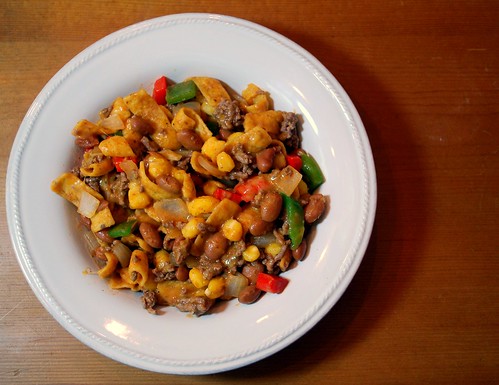
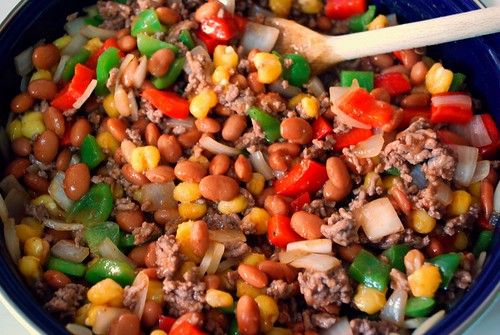
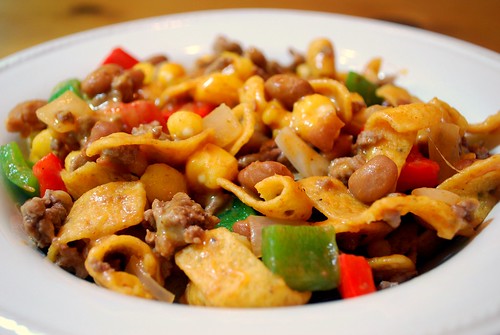
Every year, hubby gets about ten 20-lb. bags of Vidalia Onions from his rotary club. They "sell" them as an annual fundraiser. However, we usually end up giving them away to our friends, eating onions morning, noon, and night, and still allowing some of these tasty little guys to go to waste.

But this year, we came up with a way that you, dear readers, can help us out. An on that note, I'm excited to announce the first annual Vidalia Victuals Contest!

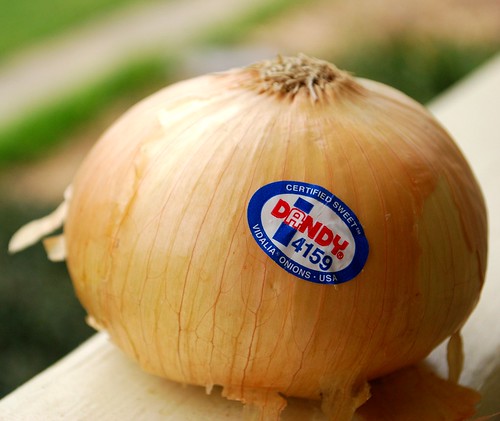
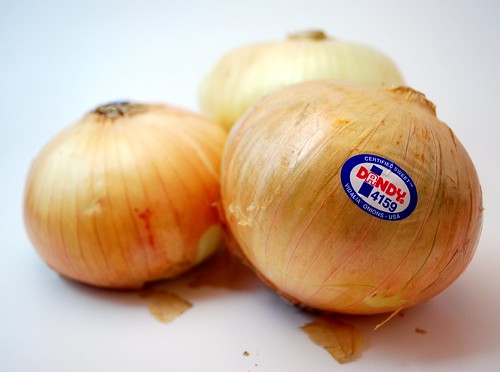
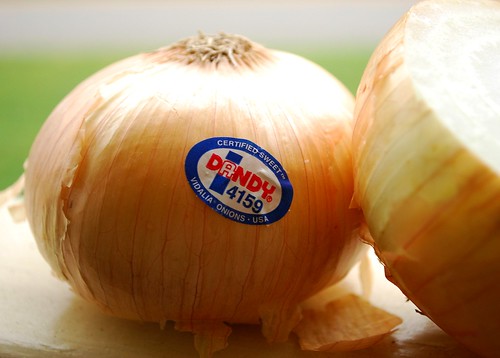
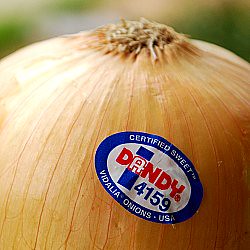
Well, the Vidalia Onion crop is officially in! It's a happy time for Georgians and onion-lovers all over the South. If you're looking for these babies in your local grocery store, be sure to look for the "Vidalia" on the sticker, as shown in the pictures here.


Here's how the Vidalia Victuals Contest will work.
  1. Submit your all-time favorite vidalia onion recipes to me (either by commenting on this post or by emailing me) by Monday, May 11, 2009 at 11:59 PM. In any cases of duplicate recipes, then I will accept the one that was submitted first. Limit one recipe per person, so pick your very best recipe!
  2. Then, the hubby and I will select 10 recipes that will advance to the Final Round. These recipes will be selected based on their creativity, their southern-ness, and their ability to showcase the distinctive Vidalia flavor.
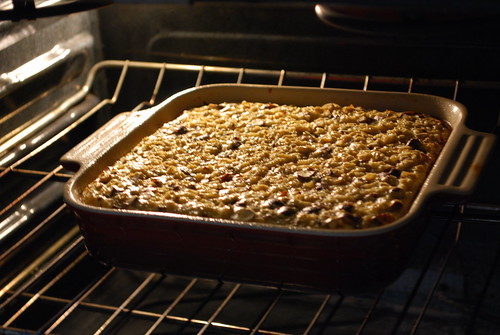
  3. I will make these 10 recipes (using our oodles of onions), and post a big round-up featuring all ten of them: pics, links to original recipes (if they are found online), all the goodies.
  4. Then, YOU, dear readers, will vote for the winner of the Vidalia Victuals Contest. The winner will not only receive fame and glory being featured on the VV blog, but will also be the proud owner of a Vidalia Onion Prize Package including fresh Vidalia onions, some of our favorite locally-produced gourmet Vidalia sauces/dressings/relishes from our local country store, and some great goodies straight from the official Vidalia Onion Committee.
Good luck!


Update:
Be sure to also enter your Vidalia Onion recipe in
the Vidalia Onion Committee's
"Sweet Times with Vidalias" Recipe Contest!
Win major cash prizes.
Submit your entries by August 14, 2009.

I know I'm going to be entering this one!!!

Wednesday, April 29, 2009

Ground Beef Goodness


I found this excellent cookbook at a book fair recently called "The Meats Cookbook" - it's from the early '70s, published by Southern Living and Progressive Farmer. It is so much fun to look through - with instructions on how to cook every cut of meat you could possibly imagine! And the recipes are definitely old-fashioned! I found one that appealed to me, mainly because it combined two rather unusual ingredients: corn chips and hominy. Well, I souped it up a little bit with some extra veggies and some different kinds of cheese, and it turned out to be amazing.

For those fo you not familiar with "hominy," it's part of the corn family - tastes like bit puffy corn kernels. The hominy paired with the Fritos makes this meal extra special - it tastes like super-lean nachos in a bowl! And this dish is a great way to sneak some veggies into your kids' (or husbands'!) meals.


Ground Beef Goodness


1 lb. lean ground beef (recommended: 93% lean)
1 medium onion, diced
1 red bell pepper, diced
1 green bell pepper, diced
1 can hominy, drained and rinsed
2 cans chili beans in mild sauce (recommended: Bush's)
1 1/2 cups shredded cheddar or Monterrey jack cheese
2-3 handfuls of corn chips (recommended: Frito's)

Heat a heavy skillet over medium heat. Add the ground beef and brown, stirring until it's done all the way through. Remove from the pan to drain on a paper towel.

Return the skillet to the stove and add the onion and peppers. Cook until fragrant and slightly softened, about 3-5 minutes. Add the hominy and the chili beans (and sauce). Continue cooking until heated through.


Finally, add the shredded cheese and the corn chips, stirring gently to incorporate. When cheese is melted and stringy, your dinner is ready. Serve immediately in bowls with big spoons.


Tuesday, April 28, 2009

Spreadin' the Blogger Love

Thanks to Mrs. Southern Belle for the Blog Award! You rock, Candy! Thank you for thinking of me!


Here are the rules: These blogs are exceedingly charming. These kind bloggers aim to find and be friends. They are not interested in self-aggrandizement.

Our hope is that when the ribbon of these prizes are cut, even more friendships are propagated. Please give more attention to these writers. Deliver this award to eight bloggers who must choose eight more and include this cleverly-written text into the body of their award.

I choose . . .
1. Brown Dog Boutique Blog
2. Good Things Catered
3. Project Prom Queen
4. Danni's Soap Box
5. Finding Serendipity
6. A Fraction of Love
7. The Perfect Pallete
8. The Budget Conscious Bride

All of these ladies blog from the heart, and I have been thrilled to get to know them better - online and off!

Monday, April 27, 2009

Pizza with Goat Cheese, Chicken, Sundried Tomatoes & Spinach


"Vish ish awshoum!"

These are the words that came out of my husband's mouth tonight as he ate his slice of pizza.

Have I mentioned that my husband hates pizza?

Well, my husband - he hates pizza. He has been known to call pizza "the torture food." As in, "Honey, why don't we order pizza tonight?" - "Oh great, the torture food."

(For those keeping score, America's Next Top Model is known as "the torture show.")

After he swallowed, he declared, more clearly, "I eat my words." I have succeeded in rehabilitating my husband from his post-college pizza-hangover, to the point where he actually likes pizza.

(I wonder if I'll be able to get him to say the same thing about ANTM one day?)

I made this recipe tonight in an attempt to re-create a dish that I used to enjoy when I was a college student in Washington, DC. On lovely spring afternoons, like the ones we've been enjoying lately here in North Georgia, my friends and I would walk over to a little Italian restaurant in our neighborhood, and this pizza is the dish I would order almost every single time. It is a combination of five of my favorite foods: pizza, goat cheese, chicken, sun-dried tomatoes, and spinach.


Paolo's Pizza

1 lb. raw pizza dough
3/4 cup tomato pizza sauce
8 oz. shredded mozzarella cheese (part skim makes it less greasy)
1/4 cup sliced sun-dried tomatoes, reconstituted in water for 10 minutes
2 ounces goat cheese (chevre), chilled
1 1/2 cups shredded cooked chicken (I recommend rotisserie chicken)
1 1/2 teaspoons Italian seasoning (or a mixture of dried basil and oregano)
2 large handfuls of baby spinach, roughly chopped

Preheat your oven to 400 degrees. Grease a large rectangular or round baking sheet or pizza pan. Roll out the pizza dough to desired thickness and place it on the prepared baking sheet. Spread the pizza sauce over the dough, leaving the edges as a crust. Arrange the shredded mozzarella evenly over the sauce.

Next, sprinkle the sun-dried tomatoes over the cheese. Then drop the goat cheese in tiny globs evenly across the pizza. Spread the chicken over the top, and sprinkle the italian seasoning evenly over the crust.


Bake for 10 minutes. Remove from the oven and sprinkle the spinach on top. Return to the oven for another 3-5 minutes. Slice and serve immediately.


Thursday, April 23, 2009

Fresh Basil Pesto Pasta with Grilled Chicken


Just the smell of fresh basil makes me weak in the knees. Luckily, ti's not a treat reserved only for summertime in our house. For my birthday a couple years ago, my sweet hubby got my an AeroGarden. This thing is amazing - we grow enough basil to have pesto about every other week! I'm planning on doing a more detailed post about this nifty gadget, but for now, here is my pesto recipe.

Classic pesto is simply a blend of basil leaves, cheese, nuts, garlic, and olive oil. It goes well with creamy cheeses on toasted crostini or crackers. It also goes extremely well with fish and chicken dishes (think grilled chicken or smoked salmon).

Our favorite, though, is to toss some farfalle (bow-tie) noodles with the pesto, topped with chunks of smokey grilled chicken.

Fresh Basil Pesto
recipe from our dear family friends Judy and Joe

1 cup fresh basil leaves, packed
1/4 cup parmigiano reggiano cheese, grated
3 tablespoons toasted pine nuts or walnuts
1-2 garlic cloves, minced
1/4-1/2 cup extra virgin olive oil
Salt and pepper to taste

Measure all your ingredients except for the olive oil into your food processor. I like to use my mini-processor for making pesto:


Pulse several times to chop the leaves and nuts into the other ingredients. Then slowly stream the olive oil in while you process the pesto on medium speed. Add just enough olive oil to reach your desired consistency (tip: make your pesto thicker for a spread, thinner for a sauce). Season to taste with salt and pepper.

Yield about 1 cup of pesto. Serve as desired (with cheese and crackers, tossed with pasta, as a glaze for roasted veggies, etc.).

Refrigerate and use yourfresh pesto withon 2-3 days OR freeze individual portions in an ice cube tray to use at your leisure!


Wednesday, April 22, 2009

Celebrating Earth Day with Flower Pot Cake!


Happy Earth Day, dear readers!

In celebration of this special day, my hubby and I made a fun Flower Pot "Cake" - ain't it purty? Okay, so you're supposed to make it in an actual flower pot, but I thought it would be so much fun to be able to see all the pretty sedimentary layers of sweetness.

I remember having this deceptive dessert when I was in elementary school. I made up this recipe based on what I remembered and what I thought would be delicious!


Flower Pot Cake

1/2 cup butter, softened
1 8-ounce package of cream cheese, softened
1/2 cup powdered sugar
3 cups vanilla pudding (instant is fine, or cooked pudding that has cooled)
1 12-ounce tub of frozen whipped topping, thawed (recommended: Cool Whip)
1 cup toasted pecans, chopped fine
1 cup graham cracker crumbs, crushed fine with a food processor or blender
1/4 cup butter, chilled
2 cups Oreo cookie crumbs, crushed fine with a food processor or blender
4-6 gummy worms
2-3 plastic flowers
1 clean small plastic shovel


Cream together the butter, cream cheese, and sugar with an electric mixer. In a separate bowl, fold in the whipped topping into the vanilla pudding. Then fold this mixture into the butter and cream cheese mixture. Set aside.

In a medium bowl, combine the pecans and graham cracker crumbs. Use a pastry blender to cut in the 1/4 cup of cold butter until the butter is incorporated and the mixture is crumbly.

Line a clay flower pot with tinfoil, cutting the excess off around the top. Sprinkle a layer of the graham cracker mixture in the bottom, pressing it down. Next, spoon a layer of the pudding mixture on top. Then sprinkle in an Oreo layer. Then spoon a pudding layer on top of that. Continue alternating (graham-pudding-oreo-pudding-graham-pudding-oreo-pudding), and end with the Oreo mixture on the top.


Arrange your gummy worms so that they are peeking out of the "soil." Then gently push your plastic flower arrangement into the pot. Chill until you are ready to serve. Serve with the plastic shovel!


Edit: I'd like to note that one reader expressed an opinion that my plastic flowers were un-earth-day-ish. You are welcome to use fresh flowers instead, in the spirit of Earth Day. I used plastic because I had some on hand that came with a wedding gift. If you choose to use fresh, I would suggest waiting until the last minute to insert them into your pot so that they don't wilt.

Tuesday, April 21, 2009

Italian Sausage Baked Ziti


Need a hearty dinner to bring to a friend? Need a dinner that freezes and travels well? Need a dinner you can make days ahead of time but still feed a crowd? This baked ziti is for you!

Italian Sausage Baked Ziti

1 lb. ziti noodles, uncooked
4-6 sweet Italian sausages, browned and sliced
1 15-ounce tub of fresh ricotta cheese
1 large egg
1/2 teaspoon garlic salt
1 teaspoon Italian seasoning (or oregano and basil)
1/4 teaspoon freshly ground black pepper
1 16-ounce jar of your favorite tomato sauce
3 cups mozzarella cheese, shredded
1/4 cup parmesan cheese, shredded


Preheat your oven to 375 degrees. Apply cooking spray to a deep-dish 9x13 inch oven-safe baking dish and set aside.

Bring a large pot of water to a boil. Cook your ziti noodles until barely al dente.

Meanwhile, in a large mixing bowl, stir together ricotta, egg, garlic salt, Italian seasoning, and pepper until completely combined. Drain your cooked ziti noodles, and pour them into the ricotta mixture. Stir until evenly incorporated.

Spread about half of the tomato sauce in the bottom of your prepared baking dish. Next, spread half of the noodle mixture on top. Then, sprinkle half of the sliced sausage over the noodles. Finally, sprinkle half of the mozzarella cheese on top. Repeat, layering the rest of the tomato sauce, noodles, sausage, and mozzarella cheese. Sprinkle the paremsan evenly across the top.

Cover with tinfoil and bake for about 30 minutes. Remove the foil and bake for another 10-15 minutes, until cheese is brown and bubbly.

God Save the Queen


Today is Her Royal Highness Queen Elizabeth II's actual birthday, and my mom and I decided to make some truly authentic English scones in celebration!

So you already know by now that my family is mostly Irish, but my my maternal grandmother, Nanny, represents our English branch of the family, and my mom's whole family grew up in Canada. Well, last night, she told me the story of when she was a little girl in her hometown of Montreal anticipating a visit from QEII. Her family and many others waved to the Queen as she traveled through town on this special visit, and here is the pin my mom wore in honor of the occasion:


She keeps this pin (and a few other memorabilia) in her dining room next to a framed photo of the Queen. She used these when we were growing up, and my mom was trying to teach me and my two rambunctious brothers our table manners. Whenever we put our elbows on the table, chewed with our mouths open, or used our fingers as utensils, she would point to the framed photo and scold, "What would the QUEEN say!?" If you've ever dined with our family, you can tell that this tactic didn't work that well, ;-) but how adorable is my mom?!?

Dear readers, I also have to tell you that my mom and I firmly believe that we are closely intertwined with the royal bloodline. I will let you be the judge, but doesn't my grandmother Nanny look like the spitting image of the Queen???

The Queen ~***~ Nanny

Okay, so back to the scones. These are the most light, fluffy, and moist scones I have ever tasted outside of the British Isles. What Americans can't seem to understand is that a scone is NOT supposed to be heavy with a texture resembling that of a brick. What you're buying at Starbucks is NOT a scone, dear readers, it's a stone.

Authentic scones are light as air, with a tender, flaky crumb. They melt in your mouth like a slightly sweet biscuit. They don't crunch like a piece of biscotti. I was so excited to find this recipe on Four Obsessions - it comes straight from her "British mum." I substituted cream for milk and shortened the baking time just a tad.

Authentic British Cream Scones
adapted from Four Obsessions

1 3/4 cups flour
1 tablespoon baking powder
1/2 teaspoon salt
1/4 cup sugar
1/4 cup butter
1 cup dried fruit (optional)
1/3 cup heavy cream
1 large egg

Preheat oven to 425 degrees. Sift together the flour, baking powder, salt, and sugar. Cut in the butter until it's chunky.

Then use your fingers to flatten the buttery bits into flakes, but don't over-do it. It should not be as fine as cornmeal (like when you're making biscuits) or else your scones will be heavy. Stir in the dried fruit, if desired.

Combine the cream and the egg, beating lightly. Add to the flour mixture and stir with a fork very lightly. Turn the crumbly dough out onto a floured surface and knead gently 5 to 6 times, just until the dough comes together.


Pat into a circle about 1-1.5 inches thick. Use a sharp knife to cut into 6 wedges. Place the wedges on a greased cookie sheet, and bake for 12-15 minutes. The tops will turn lightly golden. Allow to cool for 10 minutes.


Serve warm with clotted cream, butter, jam, and/or lemon curd.


A note on dried fruit and other additions:
We made our scones plain today because we were so excited about topping them with Devonshire cream on other goodies, but here are some other ideas for additions.
  • Currants are the traditional route for scones.
  • Dried pears with crystallized ginger
  • Dried peaches and dried cranberries
  • Chopped dried cherries (especially good with orange zest)
  • Chopped dried cherries with chocolate chunks
  • Fresh or dried blueberries (especially good with lemon zest)
  • Combination of raisins (golden, dark, etc.)

Monday, April 20, 2009

Old-Fashioned Oatmeal Raisin Cookies


After college, mom and her two best friends lived together in a one-bedroom apartment in Atlanta. The apartment came with 2 cats. None of them knew much about cooking, but they would make these cookies together from Kay's grandmother's special recipe.

This cookie has a delicate crumb, a cakey texture, and a subtle spice. Warm out of the oven is the best way to eat them. They are also amazing with chocolate chips in place of the raisins. I have grown up eating these delicious scone-like treats. This comforting, old-fashioned cookie goes perfectly with a tall glass of cold milk!


DoDo's Oatmeal Cookies

from my mom's friend Kay's grandmother Dodo

1 cup butter
1 cup sugar
2 eggs
2 cups oatmeal
2 cups chopped raisins
2 cups flour
1 teaspoon baking soda
1 teaspoon cinnamon
1 cup chopped walnuts (optional)
8 tablespoons buttermilk

Preheat your oven to 350 degrees. Cream butter, sugar, and eggs in a large mixing bowl. Add the oatmeal. Sift flour, soda, and cinnamon together in a medium bowl. Alternate adding the dry ingredients and the buttermilk to the creamed mixture. Then gently stir in the raisins and the nuts - do not overmix. Drop on greased cookie sheet. Bake for 12-14 minutes.

Saturday, April 18, 2009

Southern Sweet Tea

One of my favorite delicacies of southern cuisine is a tall glass of ice cold sweet tea. People in other parts of the country might not completely understand our love affair with this curious beverage, but I'll bet that if I poured you a glass after a hot day in the sun and set you in a rocking chair on my front porch, you'd start to understand.


Southern Sweet Tea


6 cups boiling water
3 family-sized lipton tea bags or 6 regular tea bags
1 cup sugar
Ice


Steep the tea bags in in the boiling water for about 10 minutes. Remove the tea bags and pour into a half-gallon sied pitcher. Stir in the sugar until completely dissolved. Add ice until the pitcher is full. The ice will melt as it cools the tea. Serve cold with fresh ice.

Thursday, April 16, 2009

How to Make Your Own Chicken Stock


So we all buy those nice convenient little roasted chickens at the grocery store, right? They are a great shortcut for those recipes that call for cooked chicken. Well, why not make your chicken go twice as far by using the carcass to make some chicken stock? Here is a great, basic recipe. I used the recipe from my kitchen bible, The Joy of Cooking, and adapted it for the crock pot to make things extra-easy!

Basic Chicken Stock
adapted from The Joy of Cooking

1 chicken carcass
4 quarts of water
10 pepper corns
6 whole cloves
1 bay leaf
2 teaspoons parsley
1 teaspoon thyme
1 medium onion, peeled and roughly chopped
1 medium carrot, peeled and diced
3 ribs of celery, roughly chopped

Place the chicken carcass in your crock pot. Pour the water over it and add the rest of the ingredients. Cover and cook on low 6-8 hours; on high 3-5 hours. I left this batch on low overnight.


Strain well. Refrigerate or freeze in mason jars or ziplock bags until you are ready to use your stock!


Tuesday, April 14, 2009

American Style Chicken-n-Rice Stuffed Peppers


Here's a little number I made up on the go for a delicious and healthy weeknight supper. So you've seen Italian stuffed peppers, well what would an "American" version look like? Something like this. A creamy filling of chicken and rice crowned with a gooey dollop of white American cheese. It's definitely a different combination of flavors, but they come together beautifully.


Chicken-n-Rice Stuffed Peppers
from my very own little hungry brain

4 green bell peppers
2 cups brown rice, cooked in water or chicken broth
2 chicken breast, baked or boiled and shredded
1/4 cup onion, minced
1/2 cup peas, frozen/canned/fresh/whatever
1/2 teaspoon garlic
1/4 teaspoon freshly ground black pepper
1/4 teaspoon sage
2 dashes of Worcestershire sauce
1 can light condensed cream of chicken soup
1/4 cup milk
4 slices white American cheese

Preheat your oven to 375 degrees and grease a large baking dish or baking sheet. Clean and core your peppers, being sure to get out the vein in the center and all the seeds. Make sure your rice is properly cooked, and shred your chicken breasts.

het a medium skillet over medium heat and spray with cooking spray. Toss in your onion and cook for about 2 minutes, until onions become fragrant and begin to turn translucent. Add chicken, rice, peas, garlic, pepper, sage, Worcestershire, condensed soup, and milk, stirring to combine. Cook for about 3 more minutes, just to combine and heat through.

Spoon the chicken mixture into the prepared peppers, heaping the filling on top if necessary. Bake for about 20 minutes. Remove from the oven, and top each pepper with a slice of American cheese. Turn your oven up to broil, and return the peppers to the oven for 2-3 minutes, until cheese melts and begins to brown. Serve immediately.

Amish Baked Oatmeal, with a Modern Twist


I always eat breakfast, every morning. You've got to. Mom says. But I usually eat it on the run.

I'm weird. I don't get hungry until about 2 hours after I wake up. So it makes the most sense for me to take breakfast with me to work in the morning and enjoy it with my travel mug of coffee when I get there. (Those of you who know me "in real life" know that I have one heck of a commute.)

So my favorite weekday breakfasts are muffins, granola bars, and Greek yogurt. I love oatmeal with raisins in the winter, fruit smoothies in the summer. But this recipe is perfect for any time of the year.

Baked oatmeal is a traditional Amish dish, but this version uses some modern ingredients to update a classic. The oatmeal is packed with fiber, and the protein-rich soy milk will keep you full until lunch time. The cherries, hazelnuts, and chocolate chips add those extra anti-oxidants and fatty acids that keep your body healthy. And it's a super hearty, super tasty accompaniment to your coffee, to boot!

This is also a super-versatile recipe. It would be great with mashed-up banana and walnuts, with dried apricots and pecans, or even raisins and almonds - yum!


Amish Baked Oatmeal, With a Modern Twist

Inspired by a variety of online sources, and by my favorite flavors

2 cups rolled oats
2 cups light vanilla soy milk (recommended: Silk)
2 eggs
1 teaspoon baking powder
1/4 teaspoon salt
A pinch of nutmeg
2 tablespoons honey
1/2 cup dried cherries
1/2 cup chopped hazelnuts
1/4 cup semisweet chocolate chips

Preheat your oven to 375 degrees, and grease a 8x8" baking dish.

Combine all ingredients in a large mixing bowl. Bake for about 30 minutes, until oatmeal is golden brown.

This stuff is best served warm, but you might want to cool for easier slicing. Then you can store the squares, freeze them, microwave them, toast them - they're ready and on-the-go!

Monday, April 13, 2009

Patience is a Virtue

Or at least that's what my husband is always telling me.

I'm having some work done on the blog template today, so bear with me while we undergo a bit of maintenance. Thanks!

UPDATE: Looks like the changes have been successfully implemented! Yay for having 3 columns!

Outrageously Moist Banana Nut Bread


Banana bread should be many things. It should be very banana-y. It should be a beautiful golden brown. It should be studded with toasty nuts or melty chocolate chunks. It should be fresh, flavorful . . . homey. Must most of all? Banana bread should be outrageously, unbelievably moist.


Moist Banana Nut Bread
from BakeWise by Shirley O. Corriher

1 1/2 cups pecans
1 tablespoon butter
3/4 teaspoon salt, divided
1 3/4 cups flour
1 teaspoon baking powder
1/4 teaspoon baking soda
1 1/2 cups sugar
1 pinch cinnamon
1/2 cup canola oil
1 teaspoon vanilla extract
2 large eggs
1/2 cup buttermilk
2 cups mashed ripe banana
1/2 cup heavy cream

Place your oven shelf in the lower third of your oven, and preheat 350 degrees.

Arrange the pecans evenly on a large baking sheet. Place in the preheated oven and roast the nuts for about 10 minutes, until fragrant and lightly browned. Remove from the oven and stir in the butter and 1/4 teaspoon of the salt. Then allow the nuts to cool. Chop coarsely, and set aside.

Turn your oven up to 375 degrees now. Apply cooking spray and flour to a loaf pan. In a large bowl, combine the flour, baking powder, baking soda, sugar, and cinnamon. In a separate bowl, combine the oil, vanilla, eggs, buttermilk, and bananas. Form a well in the middle of the flour mixture, and pour the liquid ingredients into the well. Stir until just incorporated.

Use an electric mixer to whip the whipping cream until it forms soft peaks. Fold the whipped cream gently into the batter. Add the nuts and fold those in as well.

Pour batter into the prepared loaf pan and bake for about 35 minutes, until the loaf is a light golden brown and a toothpick inserted into the center comes out clean. Allow to cool for 10 minutes before removing the bread from the pan. Then let it cool completely before slicing. Enjoy!


Made by Lena